Contents
- 1 Introduction to Xbox and Laptop Connectivity
- 2 Essential Equipment for HDMI Connection
- 3 Step 1: Setting Up Your Xbox Console
- 4 Step 2: Preparing Your Laptop for HDMI Input
- 5 Step 3: Connecting the HDMI Cable
- 6 Step 4: Configuring Display and Sound Settings
- 7 Troubleshooting Common HDMI Connection Issues
- 8 Enhancing Your Gaming Experience
Introduction to Xbox and Laptop Connectivity
How to play xbox on laptop with hdmi? Connecting your Xbox to a laptop using an HDMI cable is straightforward and it can enhance your gaming experience. Doing so enables you to use your laptop’s display for gaming, just as you would with a standard monitor or TV. High-definition multimedia interface, or HDMI, carries both video and audio in a single cable, making it a convenient option for streaming high-quality content.
To get started, ensure that your laptop supports HDMI input, not just output. Most laptops are typically designed with HDMI output, but input capability, which you’ll need for this purpose, is less common. If your laptop does not support HDMI input, you may need to use an HDMI capture card which will convert the signal.
Using an HDMI cable to connect your Xbox to your laptop can also provide flexibility in terms of mobility. You may want to play your games in different locations, share your gameplay or even use recording software to capture those epic gaming moments. HDMI connectivity is not only easy to set up, but it also delivers high-definition graphics that can really make your games shine on your laptop’s screen.
In the following sections, we’ll cover the essential equipment you’ll need and guide you through each step of setting up your Xbox on your laptop using an HDMI. From setting up your console, to configuring your laptop and troubleshooting, we’ll help you get your gaming environment layout just right.
Essential Equipment for HDMI Connection

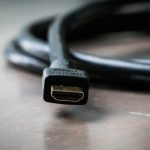
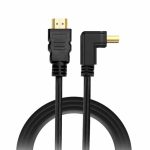
To connect your Xbox to your laptop using HDMI, you need a few key pieces of equipment. First, a standard HDMI cable is the bridge that links your console and laptop. Make sure the cable is long enough to easily reach between the two devices without creating tension or clutter.
Next, check if your laptop has an HDMI ‘input’ port. Most laptops have an ‘output’ port for displaying their screen on a TV or monitor, but input ports are rare. Without an HDMI input port, you will require an HDMI capture card. This device captures the HDMI signal from your Xbox and feeds it into your laptop via USB.
If you opt for a capture card, choose one that supports the resolution and frame rate of your Xbox games. This ensures you can enjoy your gameplay without loss of quality. Additionally, you’ll need software that can display the HDMI input from the capture card on your laptop’s screen.
Lastly, ensure your Xbox and laptop are close to a power source. Running out of battery mid-game is frustrating and could cause loss of progress if not charging while playing.
When you have all these pieces, you’re ready to move on to setting up your Xbox console for a quality gaming experience on your laptop.
Step 1: Setting Up Your Xbox Console
Before you can enjoy games on your laptop, your Xbox console needs proper setup. Start by powering on your Xbox. Press and hold the Xbox button on the console or controller. Next, ensure your Xbox system has the latest updates. Keeping the system updated ensures smooth compatibility with your laptop. You can check for updates in the ‘System’ section under ‘Settings’. If an update is available, follow the on-screen instructions to install it.
Once updated, review your Xbox’s system settings. Navigate to ‘Display & sound’ under the ‘Settings’ menu. This is to make sure your Xbox’s video and audio will transfer correctly through HDMI. Pay close attention to the ‘TV connection’ options. Select ‘HDMI’ as this will be the type of connection you’re using with your laptop.
Also, ensure that your Xbox is set to match the resolution of your laptop’s screen for optimal display. If your laptop supports 1080p, select this resolution in the Xbox settings. Doing this ensures the best visual experience without any unnecessary scaling or distortion.
Lastly, it’s important to keep your console ventilated. Position your Xbox in an open space to avoid overheating during use. With these steps complete, you’re ready to connect your Xbox to your laptop via HDMI for a superior gaming experience. Proceed to the next step to prepare your laptop for the HDMI input.
Step 2: Preparing Your Laptop for HDMI Input
To play Xbox on your laptop with HDMI, preparation is key. Make sure your laptop has HDMI input capabilities. Laptops usually have HDMI output, so check this carefully. If yours doesn’t support input, you’ll need an HDMI capture card. Next, pick the right capture card. It should handle your Xbox’s resolution and frame rates. Once you have the card, install any required drivers or software. These will help your laptop recognize the incoming Xbox signal.
Before you connect the HDMI, reboot your laptop. This clears any current processes that might interfere with the connection. After the reboot, log in and close unnecessary programs. This helps in making more system resources available for gaming. You should also prepare the software for HDMI input. Launch the program that came with your capture card or that you’ve downloaded.
Next, adjust your laptop’s power settings. To avoid your laptop entering sleep mode while playing, set it to ‘High performance’. Also, plug in your laptop to a power source. You don’t want your laptop to run out of battery mid-game. With your laptop set up and the software ready, you’re now prepared to connect your Xbox console with the HDMI cable.
Step 3: Connecting the HDMI Cable

Now it’s time to physically connect the Xbox and your laptop using an HDMI cable. This step is simple but crucial for a successful connection. Ensure you have the proper HDMI cable on hand. It should be one that supports the latest standards for optimal gaming performance.
First, turn off your Xbox console to prevent any possible electrical issues during the connection process. Then, locate the HDMI port on the back of your Xbox. Take one end of your HDMI cable and plug it firmly into the port. Check that it is snug and secure to avoid a loose connection.
Next, connect the other end of the HDMI cable to your laptop’s HDMI input port. If you’re using an HDMI capture card, plug the HDMI into the input of the capture card. Then, connect the capture card to your laptop via USB. Once your capture card is attached and recognized by your software, check that the software is ready to receive the signal.
With both the Xbox and laptop (or capture card) connected via HDMI, you may power on your Xbox console. Your laptop should detect the HDMI input. If it doesn’t, double-check your connections and make sure the correct software is running on your laptop to handle the HDMI signal.
Before moving onto the next step, ensure that the TV or monitor you normally use for Xbox is unhooked. This way, the laptop will be the primary display for the Xbox. With the HDMI cable securely connected, you are now ready to configure the display and sound settings on your laptop to match the Xbox output.
Step 4: Configuring Display and Sound Settings
After connecting the HDMI cable, the next crucial step is to configure your laptop’s display and sound settings to ensure the best gaming experience. Check the display settings by right-clicking on the desktop and selecting ‘Display settings’. Here, ensure that your laptop recognizes the Xbox as a second display. You may need to adjust the ‘Multiple displays’ settings to ‘Duplicate these displays’ or ‘Extend these displays’, based on your preference.
For sound, right-click on the sound icon in your taskbar and select ‘Sounds’. Then, go to the ‘Playback’ tab and look for your HDMI device. It could be labeled as ‘Digital Output’ or the brand name of your capture card. Set it as the default device to route the audio from your Xbox to your laptop’s speakers or connected headphones.
Make sure the volume is at an appropriate level and that the audio output format matches your Xbox’s capabilities. This might require you to test a couple of different formats in the ‘Advanced’ section of the sound settings for optimal audio quality.
Lastly, test the video and audio output by playing a game or running an Xbox test to confirm that both picture and sound are syncing well. If everything is configured properly, you should now enjoy a seamless gaming experience on your laptop with HDMI connection from your Xbox.
Troubleshooting Common HDMI Connection Issues
Even when you’ve followed all the steps for connecting your Xbox to your laptop using HDMI, you might come across some hurdles. These common issues can often be solved with a few simple troubleshooting steps. Here are solutions to some typical problems you might encounter:
- No Signal on the Laptop: Make sure the HDMI cable is plugged in firmly at both ends. Check your laptop’s input selection to ensure it’s set to HDMI.
- Poor Image Quality: Adjust the Xbox’s display settings to match your laptop’s resolution. Try testing with another HDMI cable if the problem persists.
- Audio Not Working: Verify the laptop’s sound settings and set the HDMI output as the default device. Restart both devices to refresh the audio connection.
- Gameplay Lag: Close other running applications on your laptop. Switching to a ‘High performance’ power plan can also help reduce lag.
- Capture Card Not Recognized: Disconnect and reconnect the capture card. Install any pending software updates or drivers for your card.
If these initial troubleshooting steps don’t resolve your issues, consider consulting the user manuals for your laptop and Xbox. Sometimes, specific model-related solutions are necessary. As a last resort, contacting support for your devices can provide further assistance.
Remember, patience and systematic troubleshooting are key to solving HDMI connectivity problems. Take your time to go through each step, and you’ll be back to gaming in no time.
Enhancing Your Gaming Experience

Once you have successfully connected your Xbox to your laptop using HDMI, you’re ready to dive into an enhanced gaming experience. To get the most out of your setup, consider the following tips:
- Adjust the Screen Resolution: Make sure your Xbox and laptop resolutions are aligned for the sharpest image. Go to your Xbox settings and pick the resolution that matches your laptop’s display.
- Optimize Sound Settings: For immersive audio, tweak your laptop’s sound settings. Choose the right output format to match your Xbox for the best sound quality.
- Fine-Tune Game Performance: Some laptops let you adjust graphic settings to enhance gaming. Explore these options to boost performance.
- Use High-Quality HDMI Cables: For a smoother experience, invest in a high-quality HDMI cable that can handle high speeds and resolutions.
- Keep Everything Updated: Regularly update your Xbox and any software on your laptop. Updates can improve the stability and performance of your connection.
- Secure Network: Ensure a stable internet connection if you’re playing online. A wired Ethernet connection might provide a more reliable experience than Wi-Fi.
With these enhancements, you’ll take your gaming to new heights and enjoy every moment playing Xbox on your laptop.

