Contents
Introduction
When setting up your home network, one of the most crucial steps is understanding your router address. This address allows you to access your router’s settings, manage configurations, and troubleshoot any issues that may arise. Knowing how to locate your router address is essential for optimizing your Wi-Fi performance, enhancing security, and ensuring that your home network runs smoothly.
In this article, we will guide you through the process of finding your router address. We will cover everything from understanding what a router address is to providing detailed step-by-step instructions on accessing it. By the end of this guide, you’ll have a thorough understanding of how to navigate your home network setup effectively.
What is a Router Address?
Definition and Purpose
A router address, often referred to as the default gateway, is a unique IP address assigned to your router by your Internet Service Provider (ISP). This address acts as a point of access, allowing communication between your home network and the internet. It enables devices connected to your network to send and receive data to and from the internet.
Common Router Addresses
Most routers use standard IP addresses. Here are a few common ones:
- 192.168.1.1 – Frequently used by Linksys and some NETGEAR routers.
- 192.168.0.1 – Commonly found in D-Link routers.
- 192.168.100.1 – Used by many cable modems or ISP-specific routers.
- 10.0.0.1 – Standard for certain Xfinity and Comcast routers.
Understanding these addresses is essential. If your router uses a different address, you can locate it by looking at the device or documentation.
How to Find Your Router Address
Finding your router address can vary depending on your operating system. Here’s how to do it on different devices:
Windows
- Open Command Prompt: Press the Windows key, type “cmd,” and hit Enter to open Command Prompt.
- Run ipconfig: In the Command Prompt window, type
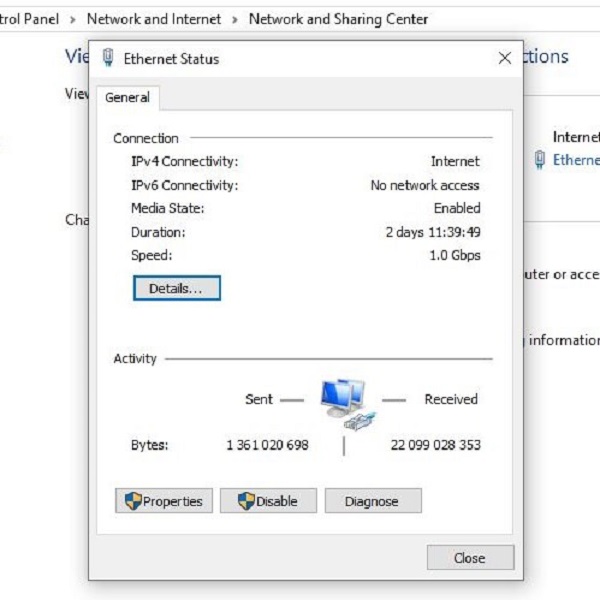
ipconfigand press Enter. - Locate the Default Gateway: Look for either the “Ethernet adapter” or “Wireless LAN adapter” section. The router address will be listed next to “Default Gateway.”
macOS
- Open System Preferences: Click on the Apple logo in the top left corner and select “System Preferences.”
- Select Network: Click on the “Network” icon.
- Choose Your Network: Select your active network connection (either Wi-Fi or Ethernet).
- View Router Address: The router address will be displayed as “Router” in the network details pane.
Mobile Devices
For iOS
- Open Settings: Tap the “Settings” app on your iPhone or iPad.
- Select Wi-Fi: Tap on your active Wi-Fi network.
- Find Router Address: Look for “Router” under the network details; this is your router address.
For Android
- Open Settings: Go to your device’s “Settings.”
- Select Network & Internet: Tap on “Network & Internet” then “Wi-Fi.”
- Find Network Details: Tap on your active Wi-Fi network. The router address should be displayed as “Gateway.”
Accessing Your Router Settings
How to Log Into Your Router
Once you have found your router address, you can log into your router’s settings to manage configurations. Here’s how:
- Open a Web Browser: Launch any web browser on your connected device.
- Enter the Router Address: Type the router address into the address bar and hit Enter.
- Enter Credentials: You will be prompted for a username and password. These details can be typically found on the router itself or in its manual. Common defaults include:
- Username: admin
- Password: password or admin
Once logged in, you’ll see the router’s interface. This dashboard allows for a variety of adjustments. Typical sections to explore include:
- Wireless Settings: This section allows you to change your Wi-Fi network name (SSID) and password.
- Security Settings: Adjust firewall settings and enable encryption methods.
- Device Management: Monitor connected devices and manage their access.
Setting Up Security Features
- Change Default Credentials: Always change the default username and password to secure your router from unauthorized access.
- Enable WPA3: Set your Wi-Fi security to the highest standard available, typically WPA2 or WPA3.
- Turn Off WPS: If your router supports WPS (Wi-Fi Protected Setup), consider turning it off as it can introduce vulnerabilities.
Troubleshooting Common Router Issues
Connectivity Problems
Identify Physical Connections
- Check Cable Connections: Start by inspecting all cables connected to your router. Ensure that the Ethernet cables, coaxial cable, or DSL line are firmly plugged into their respective ports. Loose connections can lead to intermittent connectivity issues or complete loss of internet access.
- Examine the Power Supply: Verify that the power cable is securely connected both to the router and to the wall outlet. If the connection is loose, the router may not function properly. It’s helpful to check for any visible damage to the power cable as well.
- Observe Router Indicator Lights: Most routers have indicator lights that show the status of the device. Examine these lights to ensure they are illuminated as expected:
- Power Light: This should be on, indicating that the router is receiving power.
- Internet Light: This should also be illuminated, signifying a stable connection to the internet.
- Wi-Fi Lights: These indicate whether the wireless network is active and functioning.
- Inspect All Connected Devices: Look at the devices connected to your network, such as computers, smartphones, and smart TVs. Ensure that they are connected properly via wired connections or Wi-Fi.
Reboot the Router
- Unplug the Router: Start the reboot process by unplugging the router from its power source. This action cuts off power, which is essential for the reset.
- Wait for 30 Seconds: Allow the router to remain unplugged for at least 30 seconds. This waiting period lets residual power dissipate, ensuring that all settings are cleared and the device is fully reset upon restarting.
- Reconnect Power: After the waiting period, plug the router back into the power outlet. Make sure the connection is secure so it can power on correctly.
- Allow Time to Restart: Once plugged in, give the router a few minutes to reboot fully. During this time, the router will go through its startup sequence and reconnect to the internet. Monitor the indicator lights to ensure the reboot was successful.
Check ISP Status
- Visit ISP Website or Social Media: A good first step to diagnose connectivity problems is to check your Internet Service Provider’s (ISP) website or their social media pages. Many ISPs post updates about service outages or maintenance work that could impact your connection.
- Use Outage Detection Tools: There are several online tools and websites that track service outages in real-time. You can enter your location to see if others in your area are reporting similar issues with the ISP.
- Call Customer Service: If the online search does not provide clear answers, consider calling your ISP’s customer service line. Have your account information ready, and inquire whether there are current outages or maintenance activities in your vicinity.
- Ask About Estimated Resolution Times: If there is a reported outage, ask the representative for an estimated resolution time. This information can help you plan your internet usage and understand when you can expect service to be restored.
Slow Internet Speeds
- Evaluate Bandwidth Usage: If multiple devices are using bandwidth, speeds may slow. Temporarily disconnect devices to see if performance improves.
- Change Wi-Fi Channel: If you experience interference, especially in densely populated areas, adjusting the Wi-Fi channel in the router settings can help alleviate congestion.
- Firmware Updates: Regularly check for firmware updates within the router’s settings to ensure optimal performance.
Device Connection Issues
- Forget and Reconnect: If a specific device cannot connect, forget the network and reconnect. Make sure it has the correct password.
- IP Address Conflicts: Ensure there are no IP address conflicts among devices. Setting a static IP for certain devices can help.
- Network Type: Check to ensure the device is connecting to the correct network type (e.g., 2.4 GHz vs. 5 GHz).
Maintenance Tips for Your Home Network
Regular Check-ups
- Monthly Reboots: Consider rebooting your router monthly to refresh the connection and clear temporary settings. This practice can enhance long-term performance.
- Monitor Devices: Regularly check the connected devices list to spot any unauthorized connections.
Security Practices
- Update Passwords: Change your Wi-Fi password periodically to enhance security. Using a password manager can help maintain complex passwords.
- Disable Remote Management: If you don’t need to access your router settings remotely, disable this feature. Keeping it off can prevent unauthorized access.
Consider Upgrading Your Router
If you find that your internet service consistently underperforms, consider upgrading to a newer modem router or seeking a higher-tier subscription from your ISP. Modern routers offer improved performance, speed, and security features.
Conclusion
In conclusion, knowing how to find your router address is vital for effectively setting up and maintaining your home network. Whether troubleshooting common issues or enhancing your network security settings, being familiar with your router’s interface can empower you to take control of your internet experience.
By following the instructions in this guide, you can easily find your router address and navigate the setup process confidently. Remember to maintain your network regularly and secure it against unauthorized access to ensure a smooth and enjoyable online experience for everyone in your household.
With the right knowledge at hand, you can take control of your home network and ensure smooth streaming, gaming, and browsing whenever necessary. Don’t hesitate—implement these tips today and keep your home internet experience at its best! By being proactive, you’ll not only solve immediate issues but also prevent future problems, ensuring your network remains robust and reliable.
Ultimately, understanding your router address and how to manipulate your router settings can greatly improve your connectivity and overall satisfaction with your home network. Enjoy the seamless operation of devices, manage your settings efficiently, and make the most out of your internet service!