Contents
- 1 Understanding HDMI Issues on Xbox One
- 2 Symptoms of a Faulty Xbox One HDMI Port
- 3 Tools and Materials Needed for HDMI Port Repair
- 4
- 5 Safety Precautions Before Starting the Repair
- 6 Step 1: Disassembling the Xbox One Console
- 7
- 8 Step 2: Removing the Old HDMI Port
- 9 Step 3: Installing the New HDMI Port
- 10
- 11 Step 4: Reassembling the Xbox One Console
- 12 Testing the Xbox One HDMI Port After Repair
- 13 Tips for Maintaining Your Xbox One HDMI Port
- 14
- 15 Conclusion
Understanding HDMI Issues on Xbox One
The HDMI port on an Xbox One can sometimes fail, causing frustration for gamers. If you’re struggling with issues related to the HDMI port, you are not alone. Many users encounter problems that disrupt their gaming experience. Fortunately, there are several methods to address these issues effectively. In this guide, we will explore how to fix hdmi port on xbox one, providing detailed steps to troubleshoot and repair your device.
Symptoms of a Faulty Xbox One HDMI Port
Identifying the symptoms of a faulty HDMI port on your Xbox One is key to a successful repair. Here are some signs that might indicate your HDMI port needs attention:
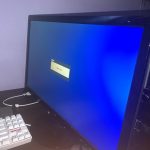
- No Signal: The most common sign is your TV displaying a ‘No Signal’ message even though the Xbox is on.
- Fuzzy or Unstable Picture: If you get a picture, but it’s fuzzy, cuts in and out, or has lines running through it, this could be a symptom.
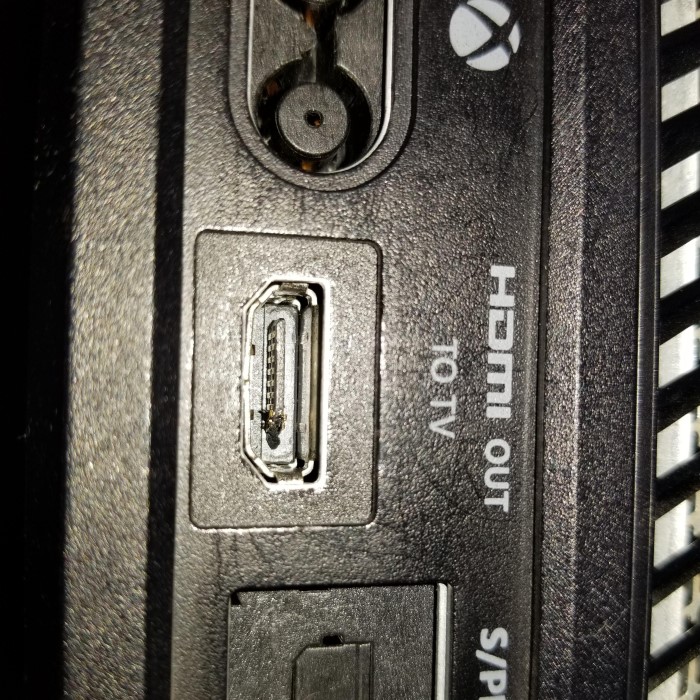
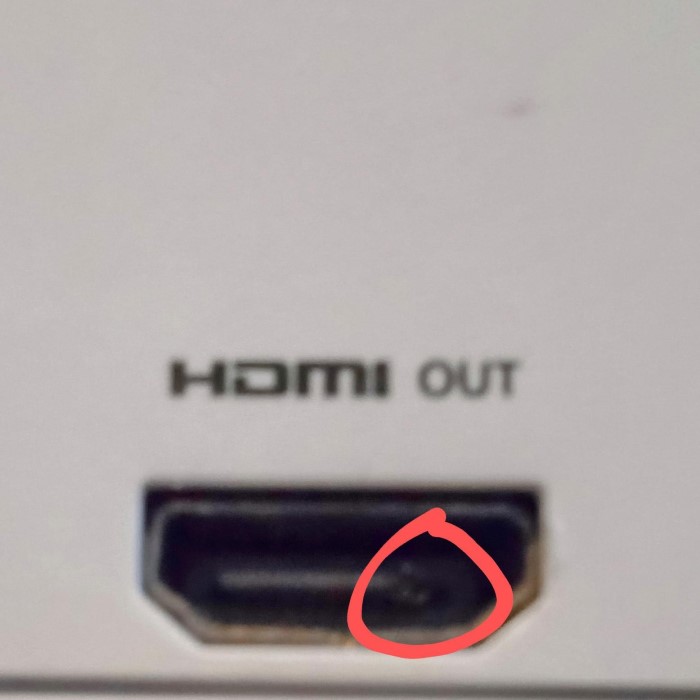
- Physical Damage: Look at the HDMI port. If you see bent or broken pins or any physical damage, it’s likely the cause of your issues.
- Intermittent Connection: If the connection works sometimes and not others, or if moving the HDMI cable affects the connection, the port might be faulty.
- Sound Issues: Problems with sound or audio that cuts in and out can also stem from HDMI port issues.
If you notice these issues, it’s essential to proceed with caution and follow the next steps for repairing how to fix the HDMI port on your Xbox One.
Tools and Materials Needed for HDMI Port Repair
Before learning how to fix the HDMI port on your Xbox One, gather the right tools and materials. Having everything on hand streamlines the repair process. Here’s what you’ll need:
- Replacement HDMI Port: Ensure you have the correct model for your Xbox One.
- Soldering Iron: This is for removing the old port and attaching the new one.
- Solder: You’ll need solder to form secure connections on the new HDMI port.
- Desoldering Wick/Braid: This helps remove the old solder from the board.
- Flux: Flux assists in soldering by cleaning and flowing the solder.
- Tweezers: For handling small components and wires while soldering.
- Magnifying Glass or Microscope: This will help you see the small pins on the HDMI port.
- Isopropyl Alcohol and Cotton Swabs: For cleaning the board before and after soldering.
- Screwdrivers: A set of precision screwdrivers to open the Xbox One casing.
- Heat Gun (optional): Some may prefer using a heat gun to remove the old port.
- Thermal Paste: If you remove the heat sink during disassembly, you’ll need this for reapplication.
- Safety Glasses: Protect your eyes from any solder splatter.
Ensure you have a clean, well-lit workspace to carry out the repair. Take care when using the soldering iron, as it’s very hot and could cause burns or damage to other Xbox parts. Keep your work area well-ventilated when using chemicals like flux and isopropyl alcohol. After collecting these tools and materials, follow the outlined steps to fix your Xbox’s HDMI port.
Safety Precautions Before Starting the Repair
Prior to beginning work on how to fix the HDMI port on your Xbox One, safety comes first. Here are key precautions to keep in mind:
- Turn Off the Console: Ensure your Xbox One is completely turned off and unplugged from any power source.
- Work in a Ventilated Area: The repair process involves soldering, which can produce harmful fumes.
- Wear Safety Glasses: Protect your eyes from any accidental splashes or solder splatter.
- Handle Tools with Care: Soldering irons are hot and can cause burns. Use tools with caution.
- Avoid Static Buildup: Use an anti-static wrist strap to prevent damaging sensitive electronics.
It’s critical to follow these safety measures while repairing the HDMI port. Failure to do so can result in injury or further damage to your console. With care and caution in mind, you’re now ready to tackle the repair steps.
Step 1: Disassembling the Xbox One Console
The first step in learning how to fix the HDMI port on your Xbox One is to disassemble the console. Follow these simple steps to properly open up your Xbox One:
- Power Down: Make sure the Xbox One is completely off and disconnected from all power sources.
- Remove Casing: Use your precision screwdrivers to take off the outer casing. Start by loosening screws that hold the case together.
- Detach Internal Components: Carefully remove any components blocking access to the motherboard where the HDMI port resides.
- Locate HDMI Port: Identify where the HDMI port is on the motherboard. Look closely to see how it is attached.
Take your time during disassembly. Rushing through this process can cause damage to the Xbox One. If you struggle with any step, pause and review what to do next. Remember to keep all screws and parts organized so reassembly will be smooth. With the console opened, you’re ready to proceed with removing the old HDMI port.
Step 2: Removing the Old HDMI Port
Once you’ve successfully disassembled your Xbox One, it’s time to remove the faulty HDMI port. Take care to follow each of these steps closely, as this part of the repair process is delicate:
- Heat Up the Soldering Iron: First, plug in your soldering iron and let it reach the appropriate temperature for melting solder. Typically, this will be around 300-400 degrees Celsius.
- Apply Flux: Before desoldering, apply a small amount of flux to the HDMI port connections. Flux will help the solder to melt and remove more easily.
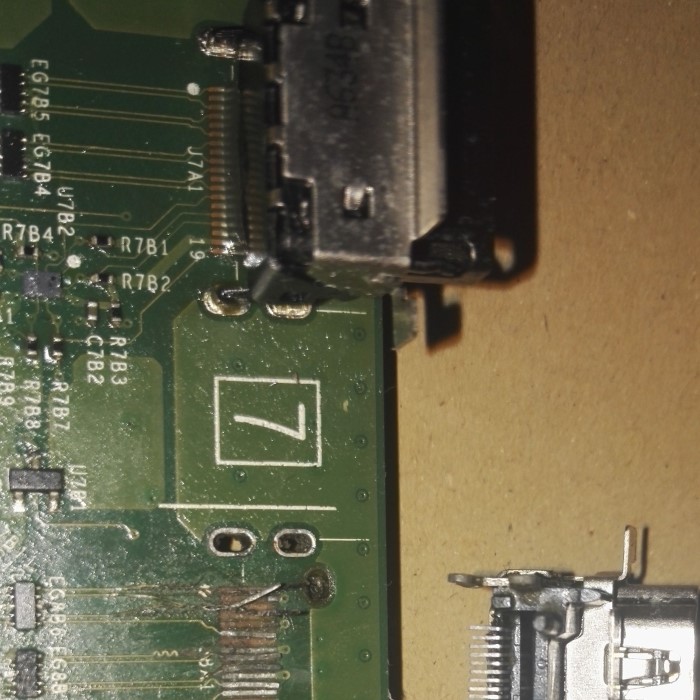
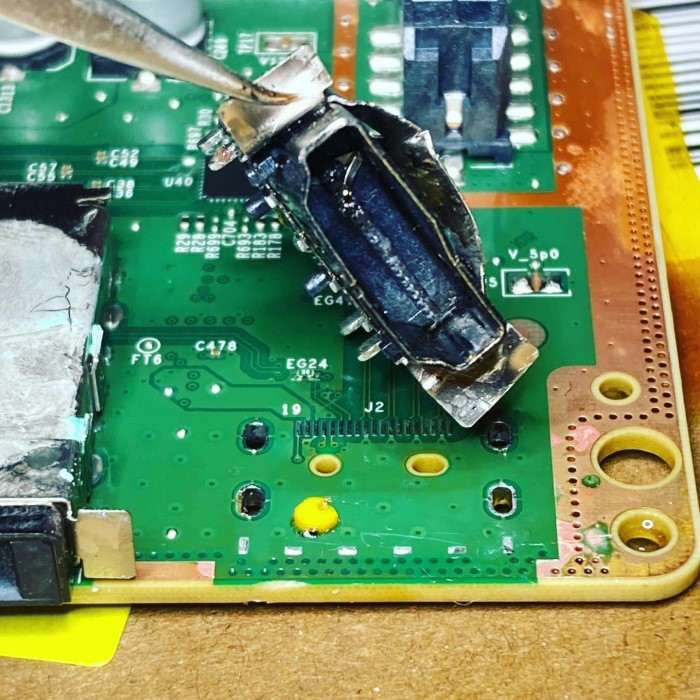
- Desolder the Pins: Carefully use the tip of the hot soldering iron along with desoldering wick to remove the solder from the HDMI port pins. Take your time to avoid damaging the motherboard.
- Remove the Port: Once the solder is removed, gently lift the old HDMI port away from the motherboard using tweezers. If it doesn’t come loose, check for remaining solder and repeat the desoldering process as needed.
- Clean the Area: After the port is out, clean any leftover flux and solder from the area with isopropyl alcohol and a cotton swab. This will prepare the surface for the new port.
Remember that patience and precision are key in this stage of how to fix the HDMI port on your Xbox One. Double-check your work to make sure no additional damage is caused to the motherboard during the removal process.
Step 3: Installing the New HDMI Port
Installing the new HDMI port is a careful process. Here are the steps to ensure a successful installation:
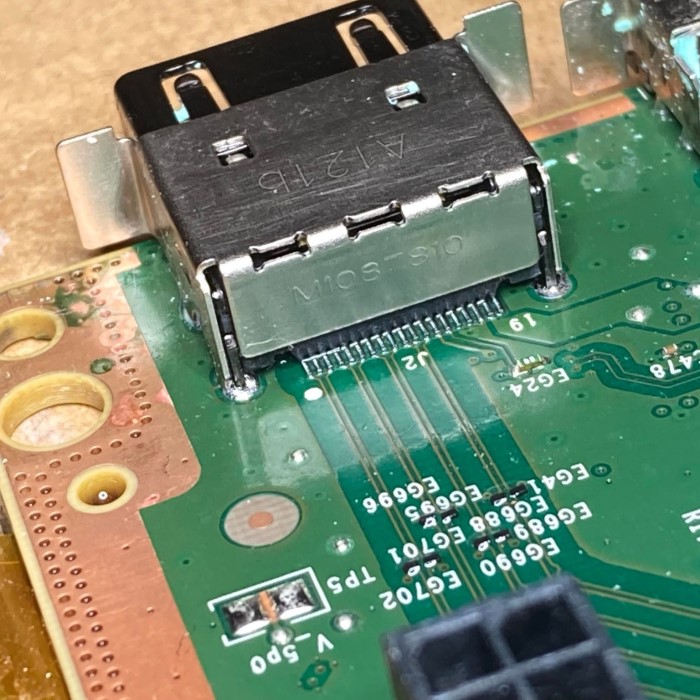
- Position the New Port: Align the new HDMI port with the motherboard’s connector.
- Secure the Port: Hold the port steady as you solder. Use tweezers for a firm grip.
- Apply Solder: Touch the soldering iron to the port pins and solder. This will connect the port to the board.
- Use Flux: Flux cleans and helps solder flow onto the connections smoothly.
- Check Connections: Make sure each pin is properly soldered. No pin should be loose.
- Inspect Your Work: Look over the connections with a magnifying glass. This ensures no shorts.
- Clean the Area: Swipe with isopropyl alcohol and a cotton swab to remove residue.
Be patient and precise. A strong, clean soldering job is key in how to fix the HDMI port on an Xbox One. If a connection seems weak, reapply solder. Do not rush as this can cause errors. Test the port before reassembling the console. Make sure it is fully functioning. Once confirmed, move on to reassembling your Xbox One.
Step 4: Reassembling the Xbox One Console
After fixing the HDMI port on your Xbox One, it’s time to reassemble your console. Follow these steps to put it back together:
- Replace the Components: Carefully put any internal parts you removed back in place. Fit them correctly to avoid issues.
- Screw in the Motherboard: Reattach the motherboard to the casing using the screws you took out. Tighten them, but don’t overdo it.
- Reattach the Casing: Line up the outer shell of the Xbox One and press it back together.
- Secure with Screws: Use your precision screwdrivers to replace the screws you initially removed.
While reassembling, make sure you handle the console gently. If any parts seem not to fit, do not force them. Double-check to see if they are correctly oriented and try again. Gently press the casing until it clicks into place, ensuring no gaps or loose ends.
Reconnecting the cables is the final step. Plug the power cable in and connect the HDMI cable to your newly repaired port. Once everything is in place, your Xbox One should be good as new. Remember, patience is key throughout this step of how to fix the HDMI port on your Xbox One. Rushing can cause new problems, so take your time to get it right.
Testing the Xbox One HDMI Port After Repair
After learning how to fix HDMI port on Xbox One and reassembling the console, it’s crucial to test the HDMI port. This ensures your repair was successful. Here’s a simple testing process:
- Connect the Power Cable: Plug in your Xbox One to a power source.
- Attach the HDMI Cable: Connect the HDMI cable from your Xbox One to your TV or monitor.
- Turn on the Console: Power up your Xbox One.
- Check for Signal: Look for the Xbox dashboard on the screen. No signal may mean further troubleshooting is needed.
If your TV recognizes the Xbox One and displays the dashboard without issues, the repair is likely successful. If there are still issues, double-check your soldering work or consult a professional.
When testing, pay attention to the quality of the image and sound on your TV. The picture should be stable, clear, and without any artifacts. Also, listen for consistent audio without cuts. If you encounter problems, it could indicate a loose connection or another faulty component.
It’s satisfying to fix your Xbox and save costs on repair services. However, if testing fails, it’s better to seek help than to risk further damage. Use this guide as a starting point, and don’t hesitate to get professional support when needed.
Tips for Maintaining Your Xbox One HDMI Port
Maintaining your Xbox One HDMI port is important to avoid future issues. Here are some tips:
Keep the Ports Clean
- Importance of Cleanliness: Regularly cleaning the HDMI ports on your Xbox One is essential for maintaining good connection quality. Dust and debris can accumulate over time, leading to connectivity issues.
- Using Compressed Air: To effectively remove dust, use a can of compressed air. Hold the can upright to avoid any liquid propellant from escaping and gently blow air into the HDMI port to dislodge any particles.
- Routine Maintenance: Make cleaning the HDMI ports part of your regular maintenance routine. Establish a schedule, such as monthly cleaning, to ensure that your console remains in optimal condition and to avoid any unexpected connection problems.
Handle Cables Gently
- Be Careful When Connecting and Disconnecting: When plugging in or unplugging HDMI cables, always handle them gently. This reduces the risk of bending or damaging the pins within the connectors.
- Avoid Yanking: Never yank the cable out forcefully. Instead, grip the connector itself and pull straight out to minimize strain on both the cable and the console.
- Awareness of Cable Movement: Be mindful that cables should not be twisted or pulled harshly, as this can cause internal damage that may lead to failure in transmitting the signal.
Check for Cable Quality
- Invest in High-Quality Cables: Using high-quality HDMI cables is crucial for achieving the best performance from your Xbox One. Look for cables made from durable materials that are known for longevity.
- Compliance with Standards: Ensure that the HDMI cables you use support the required standards for your Xbox One. Cables that meet HDMI 2.0 or higher specifications will provide better performance, especially for high-definition content.
- Inspect for Damage: Regularly inspect your HDMI cables for any signs of wear, such as fraying or exposed wires. If any damage is found, replace the cable to avoid connection issues.
Update Your Console Regularly
- Check for System Updates: Keeping your Xbox One updated is essential for optimal function. Microsoft frequently releases system updates that can address hardware and software issues.
- Resolving HDMI Output Issues: Many system updates specifically focus on fixing bugs that may affect HDMI output. By staying updated, you reduce the likelihood of experiencing these types of hardware issues.
- Setting Up Automatic Updates: Consider enabling automatic updates on your console to ensure you always have the latest software. This can help to streamline the process and prevent any lapses in performance.
Avoid Physical Stress
- Proper Placement of Console: Ensure that your Xbox One is placed in a way that avoids bending the HDMI cables at sharp angles. Cables under stress can become damaged, leading to connection problems.
- Maintaining a Clear Area: Create space around the console to prevent accidental impacts or tugs on the HDMI cables. A stable setup protects against physical stress and promotes safer usage.
- Cable Management Solutions: Use cable management tools, such as cable ties or clips, to organize and secure cables. This helps keep them in a straight position and reduces the risk of bending.
Monitor for Heat
- Ensuring Proper Ventilation: Excessive heat is detrimental to electronic components over time. Make sure your Xbox One is housed in a well-ventilated area to maintain optimal operating temperatures.
- Avoid Blocking Vents: Ensure that the console’s ventilation ports are not blocked by objects or dust. This is crucial in preventing overheating that can lead to hardware damage.
- Consider Ambient Temperature: If your gaming area tends to get warm, try to position your console in a cooler spot. Avoid placing it near heat sources that can raise its temperature significantly.
Be Mindful of Static Electricity
- Precautions Against Static Discharge: When connecting or disconnecting HDMI cables, take care to prevent static electricity from damaging the hardware. Static can disrupt the functionality of sensitive electronic components.
- Discharge Static Safely: If possible, touch a grounded metal object before handling cables to discharge any static electricity built up in your body. This simple act can prevent damage to your console.
- Use Anti-Static Mats: For those frequently working with electronics, consider investing in an anti-static mat. These mats can minimize the risk of static shocks that could potentially harm your Xbox One and other valuable devices.
By following these tips on how to fix the HDMI port on Xbox One, you can prevent damage and ensure your HDMI port functions well for years. Remember, prevention is better than repair.
Conclusion
Learning how to fix HDMI port on Xbox One can greatly enhance your gaming experience. By following these troubleshooting steps, you can often resolve connectivity issues independently. Start with simple solutions like checking connections and cleaning the HDMI port before moving to more advanced steps. Remember, if all else fails, don’t hesitate to seek professional help. Addressing HDMI port problems promptly not only ensures a smooth gaming experience but also extends the life of your console. So, if you encounter HDMI issues, you now have the tools to fix them effectively!