Contents
Introduction to WPS on a Router
In the realm of wireless networking, maintaining security and ease of connection is essential for users looking to add devices to their home or office networks. WPS, which stands for Wi-Fi Protected Setup, is a feature designed to simplify the process of connecting devices to a secure Wi-Fi network. But what is WPS on a router, and how does it impact your ability to manage connections effectively? This article aims to demystify WPS, explain its functionality, and guide you through its uses and advantages.
As technology advances, the way we connect our devices also evolves. Gone are the days when manually entering lengthy Wi-Fi passwords was the only option for establishing a connection. With WPS, users can connect devices with a simple push of a button. This feature not only enhances user experience but also offers a layer of security that is immensely beneficial in today’s digital landscape.
Understanding WPS: The Basics
What is wps on a router? To better understand WPS, let’s explore its fundamental components and how it operates:
- What WPS Does: WPS enables users to connect their devices—such as laptops, smartphones, printers, and smart home gadgets—to a wireless network easily. This process eliminates the need for entering Wi-Fi passwords, making it accessible for people of all technical skill levels.
- Methods of Connection: WPS can usually operate through two primary methods:
- Push Button Configuration (PBC): This method requires you to press the WPS button on both the router and the device you wish to connect. When the button is pressed, a secure connection will be established automatically.
- PIN Method: In this approach, a PIN (Personal Identification Number) generated by the device is entered into the router’s interface to create a secure connection.
- Security Features: WPS utilizes strong encryption protocols such as WPA (Wi-Fi Protected Access) and WPA2 for secure connections. Depending on your router and device capabilities, using WPS helps ensure data integrity and protection against unauthorized access.
- Activation: By enabling WPS, the router will remain in pairing mode for a few minutes, allowing nearby compatible devices to connect seamlessly.
The Benefits of Using WPS on Your Router
Understanding the advantages of adopting WPS in your networking routine is integral to appreciating its importance. Here are several benefits that WPS offers:
- Simplicity and Convenience: WPS is designed for ease of use. For individuals who may not be tech-savvy, this protocol minimizes complexity. By pushing a button, connecting becomes effortless.
- Speed of Connection: Connecting devices through WPS is significantly faster than traditional methods. There’s no need to type a password after establishing a connection, saving time during the setup process.
- Enhanced Security: WPS provides security without sacrificing convenience. Since it uses strong encryption standards, it protects user data and mitigates vulnerabilities associated with revealing Wi-Fi passwords broadly.
- Guest Access: WPS can streamline guest access to your network. By allowing visitors to connect without requiring your primary Wi-Fi password, you maintain security while providing them easy access.
- Compatibility: Most modern routers support WPS, as well as many wireless devices. This compatibility ensures that WPS can be utilized across a wide range of platforms, including printers, smartphones, and tablets.
How to Use WPS on a Router
Using WPS is straightforward, but it is helpful to follow specific steps to ensure smooth operation. Here’s how you can connect your devices using WPS:
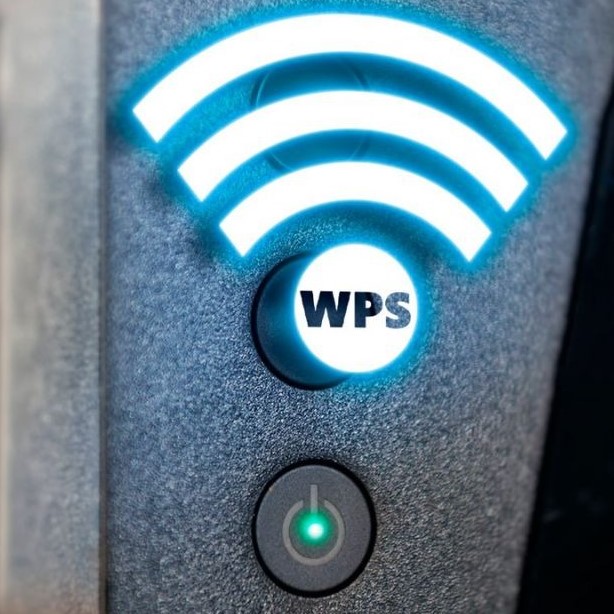
Step 1: Identify the WPS Button
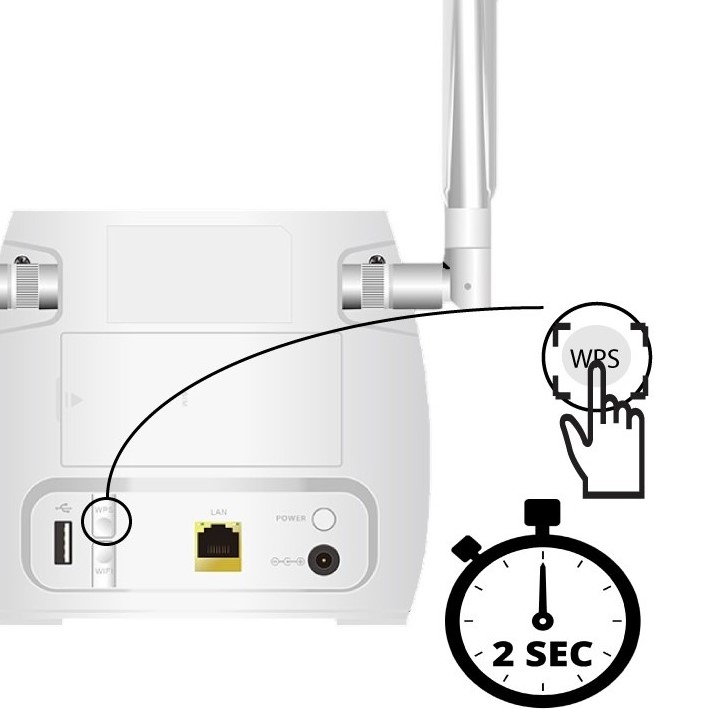
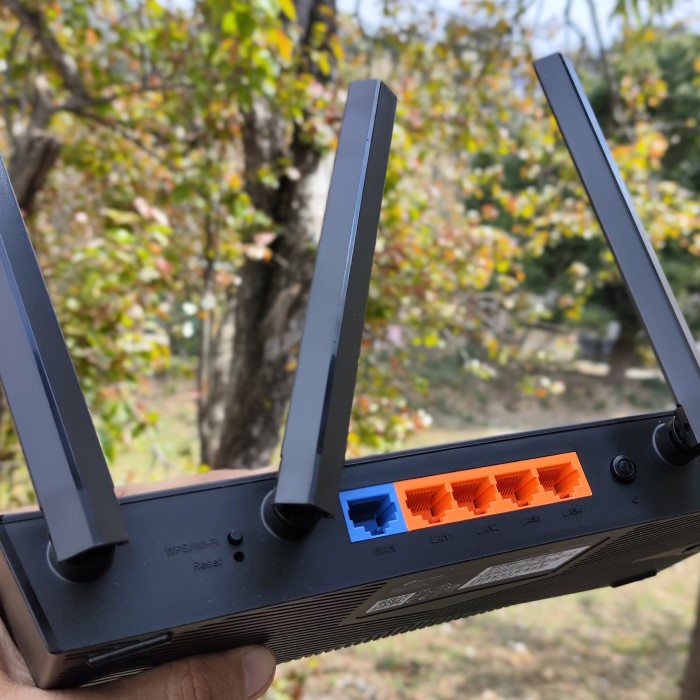
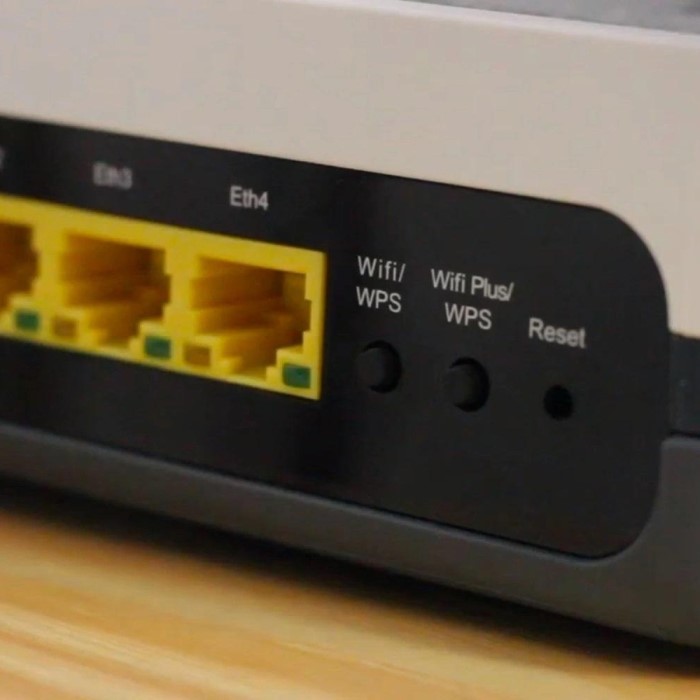
First, locate the WPS button on your router. The position can vary based on the brand and model, but it’s commonly found on the back or side panel. Some devices may not have a physical button but instead provide a WPS option in their web interface.
Step 2: Activate WPS Mode
- Push Button Method: Simply press the WPS button on your router, and observe the WPS indicator light start blinking.
- PIN Method: Log into your router’s web interface through a browser. Look for a section related to WPS settings. Enter the generated PIN from the device you want to connect.
Step 3: Connect Your Device
For the Push Button Method:
- Press the WPS button on your router.
- Simultaneously press the WPS button on the device you want to connect.
- Monitor the connection as the lights on the devices indicate that they are pairing.
For the PIN Method:
- Go to the WPS settings on your connecting device: tap the WPS option.
- Enter the PIN shown on your router’s interface.
- Wait for confirmation that the device has successfully connected.
Step 4: Confirm the Connection
Once connected, your device will display a confirmation message, and the WPS indicator light on the router will become stable, indicating a successful connection.
Troubleshooting WPS Connection Issues
Even though WPS is designed to be user-friendly, you might sometimes encounter difficulties. Here are some common issues and solutions:
WPS Button Not Responding
- Check for Hardware Malfunctions: If pressing the WPS button on your router doesn’t elicit any response, it may indicate a potential hardware issue. Inspect the button visually to ensure it’s not stuck or damaged.
- Reset the Router: Sometimes, simply resetting the router can resolve connectivity problems. Unplug the router, wait for about 30 seconds, and then plug it back in.
- Firmware Updates: In certain situations, the router may require firmware updates to function correctly. Visit the manufacturer’s website for instructions on how to update the firmware. Outdated firmware can lead to bugs and functionality issues, including problems with the WPS feature.
Device Fails to Connect
- Check WPS Feature on the Device: Confirm that the device you’re trying to connect also supports WPS. Ensure that its WPS feature is enabled, which may be found within the device’s Wi-Fi settings.
- Manual Activation: Some devices may require you to activate WPS manually through their settings. Navigate to the network settings and look for the WPS option to enable it.
- Restart Your Device: If the device is still unable to connect, try restarting it. This can refresh the connection settings and help establish a successful link with the router.
Indicator Light Issues
- WPS Light Behavior: The WPS light on the router indicates the status of the WPS feature. If the light is not responding at all, or if it is constantly on without blinking, this may signify that the router is not actively in pairing mode.
- Repress WPS Button: Attempt pressing the WPS button again after a brief moment. Sometimes the initial connection attempt may have not gone through, and re-engaging the button may help.
- Reboot the Router: If pressing the button doesn’t work, consider rebooting the router. Disconnect the power source, wait a few moments, and reconnect. This can help reset the internal systems and resolve temporary glitches.
Compatibility Conflicts
- Assess Device Compatibility: If older devices are unable to connect via WPS, they might not support the WPS feature. Check the device specifications to confirm WPS compatibility.
- Alternative Connection Methods: In cases where WPS is not an option, you can manually connect the device to the Wi-Fi network by entering the Wi-Fi password. This method guarantees that even incompatible devices can join the network.
Connection Failures
- Check for Interference: WPS connections can sometimes fail due to interference from other devices. Ensure that your router is located in an unobstructed area, away from microwaves and cordless phones, which can cause signal disruptions.
- Limit Bandwidth Usage: During the WPS connection attempt, minimize the usage of other devices that are consuming a significant amount of bandwidth. Heavy usage can lead to network congestion, which affects the ability to establish new connections.
- Retry the Connection: After checking for interference and reducing network load, try the WPS connection process again. This might yield better results under optimized conditions.
Common FAQs About WPS
When you press the WPS button on your router, it activates the WPS mode, allowing nearby devices to connect to your Wi-Fi network quickly and securely without requiring a password. This mode usually lasts a couple of minutes before it deactivates.
Why is the WPS light flashing on my router?
The WPS light on your router flashes to indicate that it is in WPS mode and searching for a device to connect to it. Once a device successfully connects, the light will typically stabilize, showing that a connection is established.
How to use WPS to connect to Wi-Fi?
To use WPS, press the WPS button on your router, then press the corresponding button on your Wi-Fi-enabled device within the available time. You can also enter the WPS PIN if your router and device support this method.
Is WPS the same as pairing?
WPS is not the same as pairing, although they share similar objectives. Pairing often refers to establishing a Bluetooth connection between devices, while WPS specifically handles Wi-Fi network connections, enhancing network security without needing to input passwords.
Conclusion: Embracing WPS for Effortless Connectivity
In summary, understanding what is WPS on a router is vital for harnessing the full potential of your wireless network. With its ability to simplify connections, enhance security, and save time, WPS offers a practical solution for connecting devices to your home or office network.
By following the steps outlined in this article, you can effectively utilize WPS to add devices effortlessly. Additionally, remaining aware of potential issues and troubleshooting methods ensures an optimized experience as you connect multiple devices effortlessly.
In a world where connectivity is key, embracing WPS can help you enjoy a seamless and secure network experience. Dive into the simplicity of Wi-Fi Protected Setup and enhance your digital lifestyle today!