Contents
- 1 Introduction: Why HDMI is Important for Your Roku TV
- 2 A Beginner’s Guide to Roku TV HDMI Ports
- 3 Setting Up Your HDMI Devices with Roku TV
- 4
- 5 Navigating the Roku TV Interface
- 6 Customizing Input Names for Easy Recognition
- 7 Troubleshooting Common HDMI Issues on Roku TV
- 8 Smart Ways to Enhance Your HDMI Experience
- 9 Conclusion: Mastering HDMI Switching on Roku TV
Introduction: Why HDMI is Important for Your Roku TV
When it comes to setting up your home theater, knowing how to switch HDMI on Roku TV is crucial. With the multitude of devices available—like game consoles, Blu-ray players, and streaming devices—properly connecting your Roku TV makes all the difference. HDMI (High-Definition Multimedia Interface) is the primary connection type for modern TVs, allowing you to transmit both high-definition video and audio through a single cable. Understanding how to navigate your Roku TV and switch between HDMI inputs efficiently can significantly enhance your viewing experience.
In this guide, we will provide step-by-step instructions on switching HDMI inputs, the importance of HDMI cable quality, and troubleshooting tips you might need.
A Beginner’s Guide to Roku TV HDMI Ports
Navigating the back or sides of a Roku TV can be challenging for new users. The first step in mastering your Roku TV’s capabilities is understanding its HDMI ports. HDMI ports are crucial for connecting various devices like gaming consoles, cable boxes, or Blu-ray players to your TV.
Identifying HDMI Ports on Your Roku TV
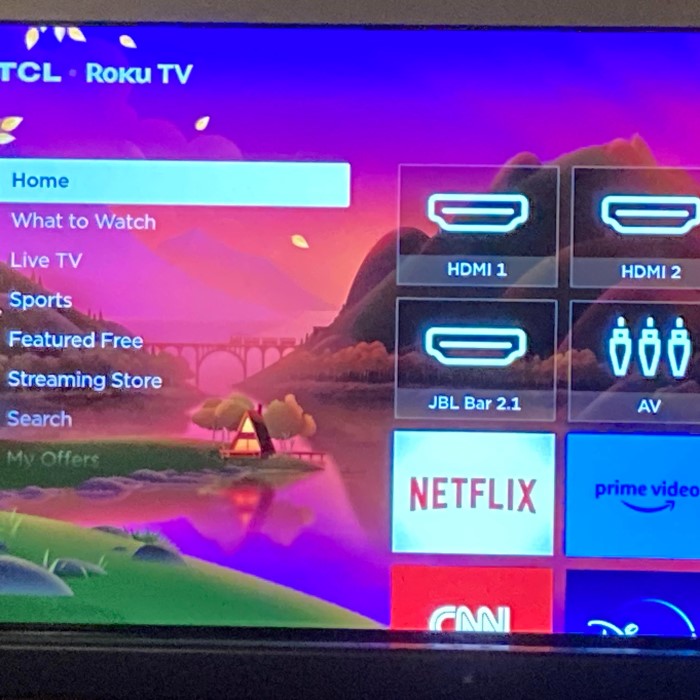
Identifying HDMI ports on your Roku TV is straightforward. Look for multiple inputs labeled as ‘HDMI’ typically situated at the back of the TV. They can also be on the side panel in some models. Each port will have a small, rectangular shape that matches the end of an HDMI cable. Remember, it’s essential to ensure the TV is powered off before plugging in any devices.
Differentiating Between HDMI 1, 2, and 3
Your Roku TV may have several HDMI ports, often labeled HDMI 1, HDMI 2, and so on. Each port functions the same but allows you to connect multiple devices at once. Differences might arise in settings where one port could support enhanced features like ‘HDMI ARC’ useful for soundbars. Use ‘HDMI 1’ for your primary device, like a cable box, and additional ports for other devices. This approach can help you organize your connections for smooth switching with your Roku TV remote.
Setting Up Your HDMI Devices with Roku TV
Setting up your HDMI devices on Roku TV is a simple task that enhances your viewing experience.
Connecting Your Devices Properly
To connect your devices properly to the Roku TV, follow these steps:
- Turn Off the TV: Ensure the Roku TV is switched off to avoid any electrical issues.
- Find the HDMI Port: Locate the HDMI ports on your TV which are typically at the back or on the side panel.
- Match the Cable: Check your device’s HDMI cable’s shape and align it with the port accordingly.
- Insert the Cable: Gently insert the cable into the HDMI port, ensuring a snug fit without forcing it.
- Attach to Device: Connect the other end of the cable to the output port of your device, like a gaming console or Blu-ray player.
By following these steps, you can be sure that your device is connected securely to your Roku TV.
Configuring the Input Settings
Once your device is connected to the Roku TV, you’ll need to configure the input settings:
- Power On Your TV: Turn on your Roku TV and the connected device.
- Go to the Home Screen: Press the ‘Home’ button on your Roku remote to access the menu.
- Select ‘Input’: Navigate using the arrows on your remote to find ‘Input’ and select it.
- Choose HDMI Port: You’ll see the HDMI port numbers you’ve used; select the one corresponding to your device.
- Confirm Selection: Confirm your choice, and your TV should now display the output from your device.
Configuring your input settings lets you switch between HDMI devices seamlessly using your Roku TV remote.
Navigating the Roku TV interface is integral to managing your HDMI connections efficiently. The user-friendly interface allows for straightforward access to all connected devices, ensuring a hassle-free experience when switching between HDMI inputs. Understanding the layout and shortcuts available can greatly enhance your TV viewing sessions.
Using the Home Screen to Switch HDMI
To switch HDMI inputs using the Roku TV home screen, follow these steps:
- Access the Home Screen: Press the ‘Home’ button on your Roku remote.
- Select ‘Input’: Use the remote’s arrow keys to find ‘Input’ on the menu.
- Choose HDMI Port: Select the HDMI port that corresponds to the device you wish to view.
- Confirm Your Selection: With your choice made, your TV will now display the device’s output.
This process allows for a straightforward way to switch between gaming consoles, cable boxes, and other devices connected via HDMI.
The Shortcut to HDMI Inputs
For even quicker access, Roku TV offers a shortcut to switch between HDMI inputs:
- Use the Remote: Simply press the ‘Input’ button on your Roku remote.
- Pick the Desired HDMI: A list of HDMI ports appears; choose the one you need.
- Instant Switch: Your selection will switch the TV’s input to the chosen device instantly.
Mastering the use of this shortcut can make your HDMI switching on Roku TV swift and effortless.
Customizing Input Names for Easy Recognition
Customizing the names of your HDMI inputs on Roku TV enhances your user experience. It allows you to identify connected devices quickly, making the process of switching between different HDMI sources more intuitive.
Labeling Inputs in the Settings Menu
To label your HDMI inputs:
Open the Settings Menu:
Begin by locating your Roku remote and pressing the ‘Home’ button.
This button typically has a house icon and is located at the center of the remote.
Once you’ve pressed ‘Home’, you will be directed to the main Roku menu, where you can access various features and settings.
Scan the menu options until you see ‘Settings’, which usually appears as a gear icon or labeled option at the far end of the list.
Choose ‘TV Inputs’:
In the ‘Settings’ menu, look for the option labeled ‘TV Inputs’ and select it.
This section is essential for managing how your Roku TV interfaces with various devices connected via HDMI.
Clicking on ‘TV Inputs’ will bring you to a list of all the HDMI ports and their current configurations.
Select the HDMI Port:
From the list presented under ‘TV Inputs’, identify the specific HDMI input you wish to rename.
Each HDMI port should be labeled (for example, HDMI 1, HDMI 2, etc.), making it easier to locate the one connected to your device.
Use the arrow buttons on your Roku remote to navigate through the available inputs and highlight the desired HDMI port.
Edit the Name:
Once you have selected the HDMI input you want to rename, look for the option to ‘Rename’ or ‘Edit Name’ and choose it.
An on-screen keyboard will appear, allowing you to input a new name for that particular HDMI port.
Use the remote to enter the desired name, which can be anything you prefer, such as “Game Console” or “Blu-ray Player.”
After typing in the new name, make sure to confirm or save your changes before exiting the settings menu.
This will help you to know exactly which device you’re selecting without having to remember port numbers.
Tips for Naming Devices
When naming devices, think of clear, descriptive names that make sense to you and other users:
- By Device Type: For example, ‘Game Console’ or ‘Blu-ray Player’.
- By Room Location: Like ‘Living Room’ or ‘Bedroom’, if you have multiple Roku TVs.
- By User: Assign names such as ‘Dad’s TV’ or ‘Kids’ Gaming’.
- By Usage: Use labels like ‘Movies’ for the port connected to your streaming device.
Choosing recognizable names makes it easier when you need to know how to switch HDMI on Roku TV. Keep the names short, simple and avoid special characters to ensure smooth operation.
Troubleshooting Common HDMI Issues on Roku TV
Some common issues might interrupt your HDMI experience on a Roku TV. Let’s address two frequent problems.
Resolving No Signal Errors
When your Roku TV says ‘No Signal’, don’t worry. This issue often has simple fixes:
- Check Connections: Ensure all HDMI cables are securely plugged into both the TV and connected devices.
- Select Proper Input: Double-check you’ve chosen the correct HDMI input for your device.
- Restart Devices: Unplug your TV and device from power for a minute, then reconnect.
- Try Another Port: Shift the HDMI cable to a different port to see if the issue is port-specific.
If these steps don’t work, inspect your cables for damage and consider replacing them if necessary.
Fixing Audio and Video Sync Problems
Out-of-sync audio and video can ruin your Roku TV viewing. Here’s how to tackle it:
Adjust TV Settings:
Start by accessing the main menu on your Roku TV using the remote.
Navigate to the ‘Settings’ option, which is usually represented by a gear icon.
Within the ‘Settings’ menu, look for the ‘Audio’ or ‘Sound’ section.
Once you are in the audio settings, search for options labeled ‘Audio Delay,’ ‘Audio Sync,’ or similar terms.
Select this option to adjust the delay. You may have sliding scales or preset options to help align your audio with the video.
Make small adjustments, and play some content to test if the synchronization has improved.
Restart the Device:
If adjusting the TV settings does not resolve the issue, try restarting the connected device (such as a streaming box, game console, or Blu-ray player).
To restart most devices, simply unplug it from the power source. Wait for about 10 seconds before plugging it back in.
Allow the device to boot up completely and reconnect to the Roku TV.
After restarting, check if the audio and video are now properly synced. This can often resolve temporary glitches that cause sync issues.
Update Software:
Keeping your device up to date is crucial for optimal performance. Begin by checking for software updates on your Roku TV.
Navigate to ‘Settings’ > ‘System’ > ‘System Update’ to see if any updates are available for your Roku TV.
Follow the prompts to download and install any updates.
Next, check the connected device for updates as well. Refer to the device’s settings menu to find the ‘Software Update’ option and ensure it is updated to the latest version.
Regular updates can fix bugs and improve compatibility, potentially resolving sync issues.
Use Built-in Tools:
Some connected devices have their own dedicated settings for audio and video synchronization.
Consult the manual or user guide of the device you are using to find these specific settings.
Look for options such as ‘Audio Sync Correction’ or ‘Lip Sync’ within the device’s audio settings.
Follow the manufacturer’s instructions to make the necessary adjustments.
Utilizing these built-in tools can provide personalized adjustment options that may not be available through the Roku TV alone.
If the problem persists, customer support for your Roku TV or the HDMI device may offer a solution.
Smart Ways to Enhance Your HDMI Experience
To elevate your HDMI experience on a Roku TV, there are clever strategies you can adopt.
Incorporating Universal Remotes for Input Switching
Using a universal remote can streamline your device management. It allows you to switch HDMI inputs on your Roku TV with a single click, no matter which device you want to use. Start by programming your universal remote with the necessary codes for each device. Then, you can easily toggle between your gaming console, streaming box, or any other HDMI-connected equipment. This is a smart way to reduce the number of remotes you need and simplify your viewing experience.
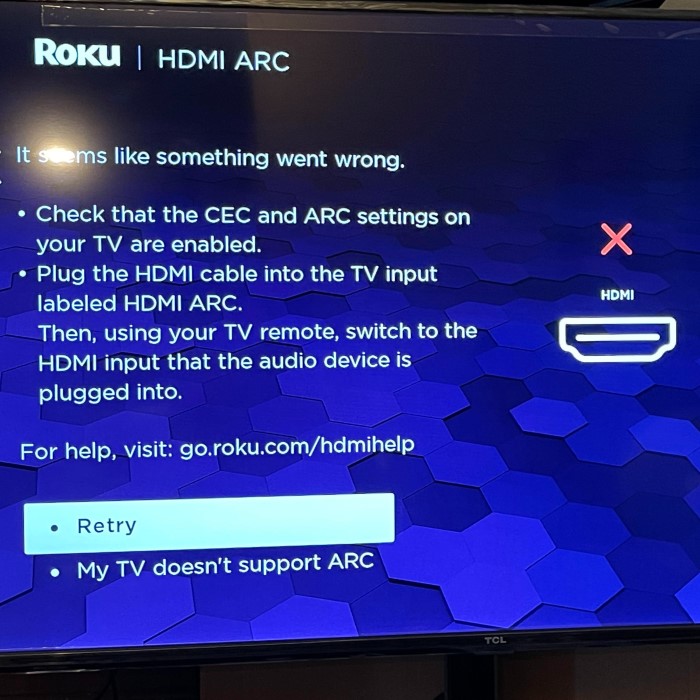
Using HDMI-CEC to Simplify Device Control
HDMI-CEC is a feature that lets your devices communicate with each other over the HDMI ports, providing a seamless control experience. With HDMI-CEC, you can use your Roku TV remote to control other connected devices like DVD players or soundbars, as long as they are CEC-enabled. To use this feature, go to the Roku TV settings and enable ‘CEC’. Each device might have a different name for this feature, such as ‘Anynet+’ for Samsung, so ensure it’s activated on those devices too. This function not only simplifies your control setup but also speeds up the process of how to switch HDMI on Roku TV.
Conclusion: Mastering HDMI Switching on Roku TV
In conclusion, knowing how to switch HDMI on Roku TV is an invaluable skill for anyone setting up their home entertainment system. This process not only opens up a world of connectivity options but also enhances your overall viewing experience. By following the steps outlined in this guide, you can effortlessly switch between various devices, ensuring you never miss a moment of your favorite content.
With a few key tips and a solid understanding of HDMI connections, you can create a seamless and enjoyable home theater setup. Embrace these insights to elevate your next movie night or gaming session! Whether you’re switching from a gaming console to a streaming service or anything in between, mastering the art of HDMI switching can make a world of difference.