Contents
- 1 Introduction
- 2 Types of Network Cables
- 3 Tools Required
- 4
- 5 How to Wire Network Cables Step-by-Step
- 6 Best Practices for Network Cable Organization
- 7 Troubleshooting Network Cable Issues
- 8 Upgrading and Maintaining a Network Cable System
- 9
- 10 Professional Network Installations vs DIY Wiring
- 11 Conclusion: Embrace Network Cable Wiring for Smart Homes
Introduction
Network cable wiring is vital for connecting devices to networks. It ensures reliable data transfer and communication. Properly installed cables enhance network speed and reduce connection interruptions. Neglecting cable wiring can lead to errors and poor network performance.

Importance of Proper Cable Wiring
Proper cable wiring guarantees stable connections for seamless data flow. It minimizes signal loss and errors during transmission. Well-organized wiring helps avoid electromagnetic interference, improving overall system reliability. It also simplifies maintenance and future upgrades, saving time and money.
Common Uses of Network Cable Wiring
Network cable wiring is widely used in homes, offices, and commercial spaces. It connects computers, servers, and other devices to local area networks (LANs) or the internet. It supports devices like routers, switches, and access points. Additionally, it provides functionality for security systems, VoIP phones, and media streaming devices.
Types of Network Cables
Network cables come in different types, each serving specific purposes. Choosing the right type depends on network requirements, speed, and distance.
Ethernet Types: Cat5e, Cat6, and Cat7
Ethernet cables are the most widely used network cables. They connect devices like computers and switches.
- Cat5e: Cat5e cables support speeds of up to 1 Gbps. They are perfect for basic setups.
- Cat6: Cat6 cables handle speeds up to 10 Gbps over short distances. They have better shielding.
- Cat7: Cat7 cables offer speeds up to 10 Gbps with improved shielding. They are ideal for less interference.
Choose Ethernet cable types based on your speed needs and installation environment.
Fiber Optic Cables
Fiber optic cables use light to transfer data. They are faster than copper cables.
- High Speed: Fiber optic cables provide high data transfer rates, ideal for large-scale data networks.
- Long Distance: These cables perform well over long distances without signal loss.
- Reduced Interference: They are immune to electromagnetic interference, ensuring reliable connections.
Fiber optic cables are suitable for backbone connections and high-speed internet.
Coaxial Cables
Coaxial cables are common in older setups and for specific applications.
- TV and Internet: They are used for cable TV and broadband internet connections.
- Durable Design: These cables have a strong build to protect them from damage.
- Limited Speed: Coaxial cables support slower speeds compared to Ethernet or fiber optics.
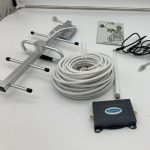
Tools Required
Proper tools are essential for network cable wiring. Using the right equipment ensures efficiency and reliability.
Essential Tools for Wiring
Here are the key tools needed for network cable wiring:
- Cable Cutter: Cuts cables cleanly for precise length adjustments.
- Wire Strippers: Removes cable insulation without damaging internal conductors.
- Crimping Tool: Attaches connectors securely to cable ends.
- RJ45 Connectors: Connectors used to terminate Ethernet cables.
- Punch Down Tool: Useful for attaching wires to patch panels and keystone jacks.
- Cable Tester: Checks for proper connections and identifies wiring faults.
- Label Maker or Tags: Helps organize and label cables for easy identification.
Using these tools simplifies installation and ensures proper connections.
Safety Equipment to Use
Safety is crucial during network cable wiring. Use the following equipment to stay safe:
- Safety Glasses: Protects your eyes from debris or accidental wire cuts.
- Gloves: Guards your hands while handling sharp tools or cables.
- Cable Clips or Ties: Prevents tripping hazards by securing loose cables.
- Work Apron or Jacket: Shields your body from unexpected wire snags or tool accidents.
Proper safety equipment not only protects you but also ensures smooth work progress.
How to Wire Network Cables Step-by-Step
Wiring network cables effectively requires precision and the right approach. Follow these step-by-step instructions to achieve reliable and functional network connections.
Preparing the Cable and Tools
- Measure Cable Length: Decide how much cable is needed for the connection.
- Gather Required Tools: Use cable cutters, wire strippers, RJ45 connectors, and a crimping tool.
- Inspect the Cable: Ensure there are no visible damages or defects on the cable.
- Organize Workspace: Arrange tools neatly to avoid confusion or interruptions during wiring.
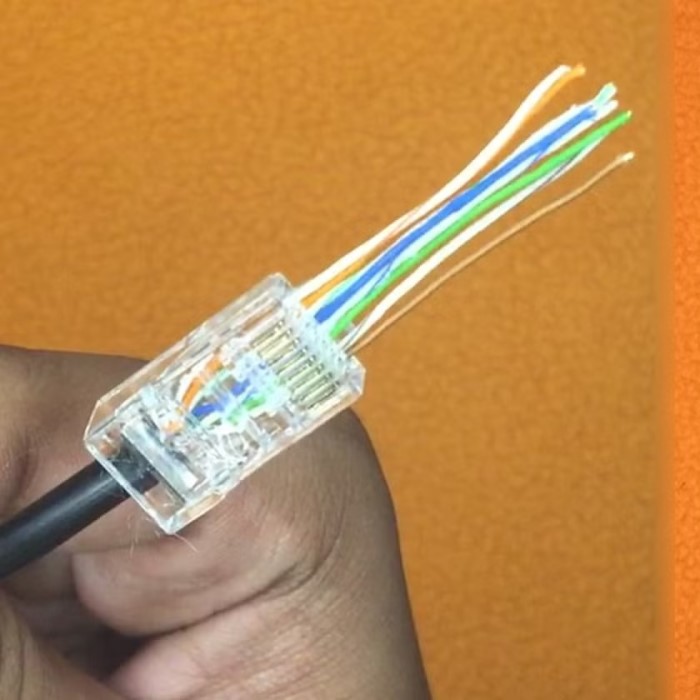
Stripping and Terminating the Cable Ends
- Strip the Cable Insulation: Use wire strippers to remove about 1 inch of the outer jacket.
- Untwist Individual Wires: Separate and untwist the colored wires carefully.
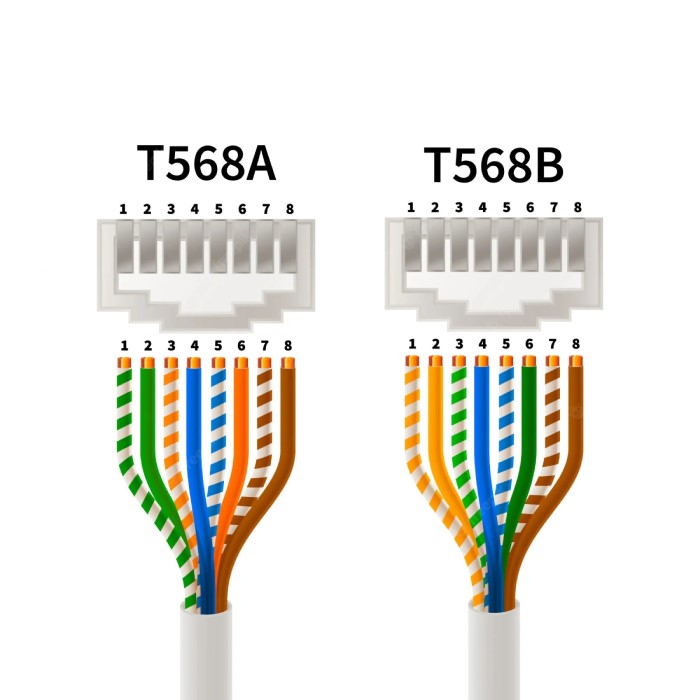
- Arrange Wires in Correct Order: Follow the T568A or T568B wiring standard for proper alignment.
- Trim Wires Evenly: Cut the wires evenly to prepare them for connection.
- Insert Wires into RJ45 Connectors: Push wires into the connector slots until seated firmly.
- Crimp the Connector: Use the crimping tool to secure the connector to the cable.
Testing and Labeling the Cables
- Use a Cable Tester: Check the cable connections for proper signal transfer.
- Identify Faults: Fix any errors detected during testing.
- Label Each Cable: Use tags or a label maker to identify cables clearly.
- Secure Loose Cables: Use cable ties to organize and prevent tangling.
Follow these steps carefully to ensure well-structured network cable wiring and system reliability.
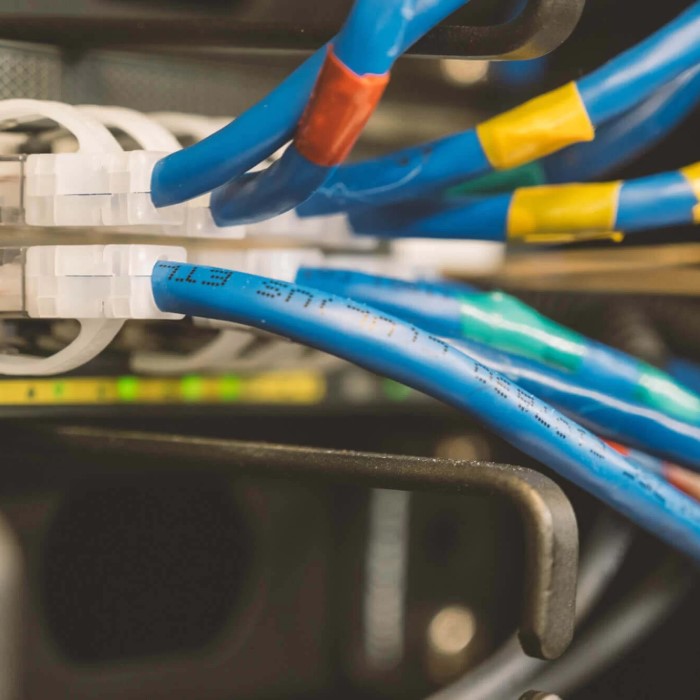
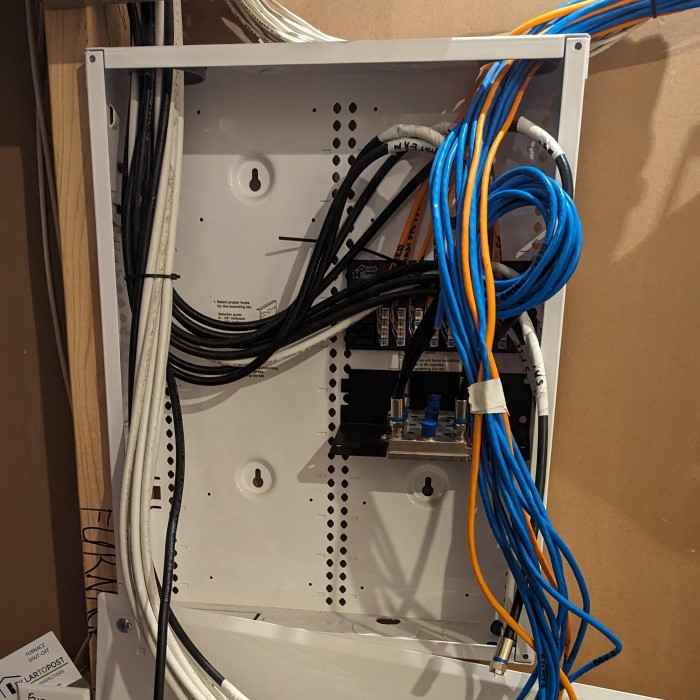
Best Practices for Network Cable Organization
Proper cable organization improves performance and simplifies troubleshooting. Messy wiring can hinder maintenance and cause signal loss.
Cable Management Techniques
- Label Cables Clearly: Use labels to identify each cable’s purpose and destination.
- Bundle with Cable Ties or Velcro Straps: Group similar cables neatly to reduce clutter.
- Install Cable Trays or Raceway Systems: Keep cables off the floor and organized.
- Use Patch Panels: Centralize and simplify connections, making future upgrades easier.
- Route Cables Strategically: Avoid crossing power cables to reduce interference.
- Allow Slack: Leave some extra length for flexibility without creating tangling risks.
Using these techniques ensures a clean and efficient network setup. Organized cables are easier to maintain and troubleshoot.
Reducing Interference and Signal Loss
- Use Shielded Ethernet Cables: Choose cables like Cat6 or Cat7 for better shielding.
- Maintain Distance from Power Lines: Separate network cables from electrical wiring.
- Avoid Bending or Twisting: Sharp bends can weaken signals and damage cables.
- Install Surge Protectors: Protect equipment and reduce risks from power surges.
- Test Signal Strength Regularly: Detect and fix any signal degradation early.
Reducing interference preserves connection quality and maximizes network reliability. Combine these practices for optimal performance.
Troubleshooting Network Cable Issues
Network cable issues can disrupt connectivity and impact system performance. Addressing these problems promptly ensures reliable and efficient networks.
Common Problems and Solutions
- Loose Connections: Ensure all connectors are firmly attached and properly crimped.
- Cable Damage: Check for visible cuts or wear. Replace damaged cables to restore functionality.
- Signal Loss: Verify cable type and length limits. Use high-quality cables like Cat6 or Cat7 for reduced interference.
- Mismatch in Standards: Ensure consistent use of T568A or T568B standards at both cable ends.
- Interference from Other Devices: Keep network cables away from power lines and electrical devices.
- Improper Terminations: Double-check wire placement in RJ45 connectors to prevent connection errors.
- Outdated Hardware: Use compatible switches or routers to support your network speed and capacity requirements.
Addressing these problems ensures a stable and optimized network system.
How to Identify Wiring Mistakes
- Use a Cable Tester: Detect faults such as continuity issues or misaligned wires.
- Look for Color Coding Errors: Verify that wires follow the correct color sequence (T568A or T568B).
- Inspect Connector Quality: Check for poorly crimped connections that may cause signal drop-offs.
- Test Both Ends of the Cable: Confirm connections are properly terminated at both ends.
- Observe Performance Fluctuations: Slow or intermittent connections often signal improper wiring.
- Replace Suspicious Cables: Swap out cables selectively to pinpoint the faulty one.
By identifying and fixing these mistakes, network reliability can be ensured, saving time and effort.
Upgrading and Maintaining a Network Cable System
Keeping your network cable system updated is critical for optimal performance. Regular upgrades prevent connectivity issues and support faster speeds. Maintenance ensures system reliability and reduces long-term costs.
When to Replace Old Cables
- Frequent Connection Interruptions: Replace cables when disruptions occur regularly due to wear or damage.
- Outdated Cable Type: Switch to modern cables like Cat6 or Cat7 for better speed and shielding.
- Visible Damage: Replace cables showing visible cuts, bends, or frays.
- Performance Drop: Upgrade cables if your network speed has decreased significantly.
- Length Limitations: Use newer cables for extensions to achieve stronger signal transmission over distance.
- Compatibility Issues: Ensure cables match the latest standards and your router, switch, or device needs.
Replacing old cables timely avoids malfunctions and ensures a robust network system.
Tips for System Maintenance
Inspect Regularly:
Make it a routine practice to visually and physically examine all cables and connections within your system.
Look for signs of wear, such as fraying or cracking in the insulation, which can lead to electrical failures.
Check for any loose terminations that might compromise connectivity and functionality.
Conduct these inspections at scheduled intervals to ensure consistent performance and to preemptively catch any issues before they escalate.
Clean Workspaces:
Regularly clean the areas where cables and devices are housed to prevent the accumulation of dust and dirt.
Use a soft, dry cloth or appropriate cleaning supplies to wipe down surfaces and cables.
Ensure that dirt does not block or interfere with connections, as this can lead to system malfunctions or degradation in performance.
Keeping a clean workspace also contributes to a safer environment free from hazards that could impact equipment longevity.
Test Signal Strength:
Make it a practice to periodically check the signal strength of your connections.
Use appropriate testing tools to measure signal quality and identify any degradation over time.
Recognizing dips in signal strength can help you address problems early, ensuring optimal performance and preventing disruptions in service.
Documentation of these tests can also help track changes and pinpoint when issues begin to arise.
Replace Failing Connectors:
Be vigilant for connectors that show visible signs of wear or are not performing as expected.
If a connector appears corroded, loose, or otherwise impaired, replace it with a new one immediately to maintain system integrity.
Ensure that replacements are compatible with your existing hardware to avoid future connectivity issues.
Regular replacement of old connectors can enhance overall system performance and reliability.
Use Surge Protectors:
Invest in high-quality surge protectors to safeguard your devices and cables from unexpected power surges, which can cause significant damage.
Ensure that all critical equipment is connected through surge protectors to mitigate risks associated with voltage spikes.
Periodically check the functionality of surge protectors and replace them as necessary to maintain effective protection.
Consider whole-house surge protection systems for comprehensive safety across all devices.
Organize System Wiring:
Take the time to neatly route and organize all cables and wiring within your system setup.
Utilize ties, clips, or racks to prevent tangling and entanglement, which can obscure the visibility of connections and create tripping hazards.
An organized system not only simplifies troubleshooting when issues occur but also minimizes signal interference caused by crossed or tangled cables.
Additionally, a tidy workspace contributes to better airflow and cooling for your devices.
Document Updates:
Maintain a detailed log of all hardware upgrades, repairs, and cable replacements within your system.
Include dates, specifications, and any relevant notes regarding performance improvements or issues encountered.
This documentation serves as a valuable reference for future troubleshooting and can help you track the history of changes made to your system.
Regular updates to this log can assist in maintaining an efficient and robust networking environment, ensuring that all components are monitored and documented effectively.
Proper maintenance prolongs network system life and minimizes performance interruptions.
Professional Network Installations vs DIY Wiring
Setting up network cable wiring can be done either professionally or as a DIY project. Each approach has its own set of advantages and challenges. Let’s explore these options to help you make an informed decision.
Pros and Cons of DIY Wiring
DIY network wiring can be rewarding if you are skilled, but it also has risks:
Pros:
- Cost Savings: A major advantage of DIY wiring is reduced installation costs, since no labor fees are involved.
- Personal Control: You have full control over the setup and design decisions for your network.
- Learning Opportunity: It allows you to learn practical skills and understand your network’s infrastructure better.
- Immediate Adjustments: You can make changes immediately without waiting for professional assistance.
Cons:
- Time-Consuming: Researching, planning, and executing the project may take significant time and effort.
- Potential Mistakes: Errors such as incorrect wiring or poor terminations can disrupt network performance.
- Tool Requirements: DIY wiring requires investing in tools like crimpers, testers, and other equipment.
- Limited Expertise: You may lack the technical knowledge to optimize cable placements and avoid interference.
Choosing a Professional Installer
Hiring a professional for network cable installation offers several benefits, though it can be costly:
Why Choose a Professional?
- Expert Knowledge: Professionals possess the expertise to ensure an efficient and error-free installation.
- Time Efficiency: They complete the installation faster than most DIY efforts.
- Advanced Tools: Professionals have high-grade equipment to test and configure the network properly.
- Structured Cabling: They implement clean, organized, and future-ready wiring layouts.
- Warranty Offers: Many installers provide warranties, giving you peace of mind for repairs or faults.
- Safety Compliance: Professionals are familiar with safety codes and best practices to ensure secure setups.
When to Use Professional Installers
- Large Projects: Valuable for complex office networks or multi-floor buildings.
- Limited Skills: Ideal if you lack experience with network wiring.
- High-Speed Needs: Professionals optimize connections for demanding applications, like fiber optic setups.
Costs to Consider
- Professional installation costs can be high. However, these fees include expertise and reliability.
- While DIY saves money, consider time spent, tools purchased, and the potential for mistakes.
In conclusion, DIY wiring is a good option for simple home setups. For advanced networks or critical reliability, hire a professional installer to ensure optimal performance.
Conclusion: Embrace Network Cable Wiring for Smart Homes
In conclusion, network cable wiring remains essential for optimizing smart homes and ensuring reliable connectivity. By selecting the right types of cables, understanding their benefits, and implementing thoughtful installation practices, homeowners can dramatically improve their networks’ efficiency. The tangible benefits of a wired network—such as stability, speed, and security—make it a worthwhile investment.
As smart home technology continues to advance, the need for robust and reliable connections becomes increasingly critical. With proper planning and execution, you can create a wired network that perfectly supports your smart home environment. Embracing network cable wiring is a proactive step towards future-proofing your connectivity needs.