Contents
Introduction
Setting up your workspace can significantly impact your productivity, especially when you incorporate tools that enhance your efficiency. The Dell K20A docking station is one such tool that transforms your work environment into a hub of organization and ease. Designed for professionals who require a seamless connection between devices, the K20A docking station offers a plethora of features that make multitasking effortless.
In this article, we’ll explore tips for setting up your Dell K20A docking station effectively. We’ll cover everything from its essential features to smart ways of connecting your devices, ensuring you can maximize the potential of your workspace. Whether you are working from home, in an office, or in a co-working space, these insights will help you make the most of your Dell K20A docking station.
Understanding the Dell K20A Docking Station
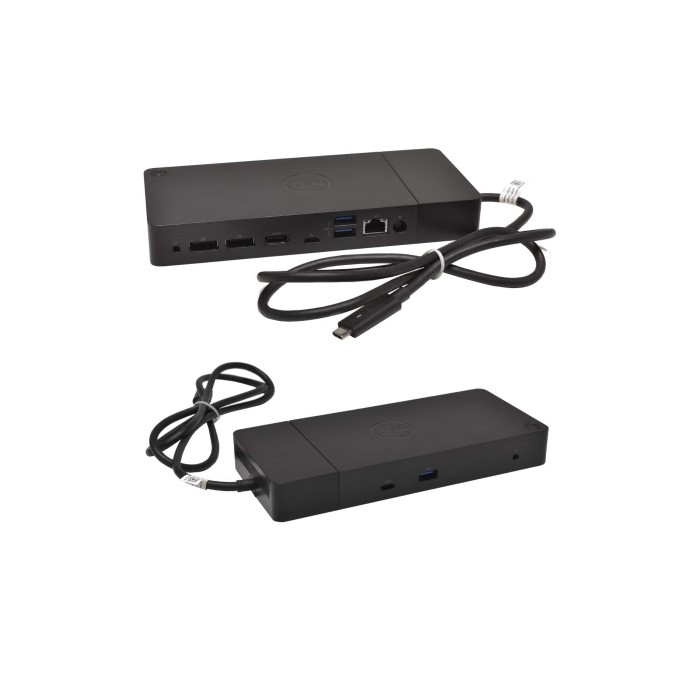
- Overview of the Device: The Dell K20A docking station is a versatile accessory designed to simplify connectivity for laptops and other devices. By utilizing a single connection point, it allows users to connect multiple peripherals, such as monitors, keyboards, and mice, enhancing your overall setup.
- Market Position: In a technology landscape filled with various docking stations, the Dell K20A stands out for its reliability and user-oriented design. It’s built for those who value efficiency and ease of use, making it a must-have for professionals and tech enthusiasts alike.
- Compatibility: Before diving into the setup process, it’s important to verify that your devices are compatible with the Dell K20A docking station. Most Dell laptops and other brands with USB-C or DisplayPort connections can benefit from this docking station.
Key Features
To make the most of your Dell K20A docking station, it’s essential to understand its core features. Here are some of the primary components that enhance functionality:
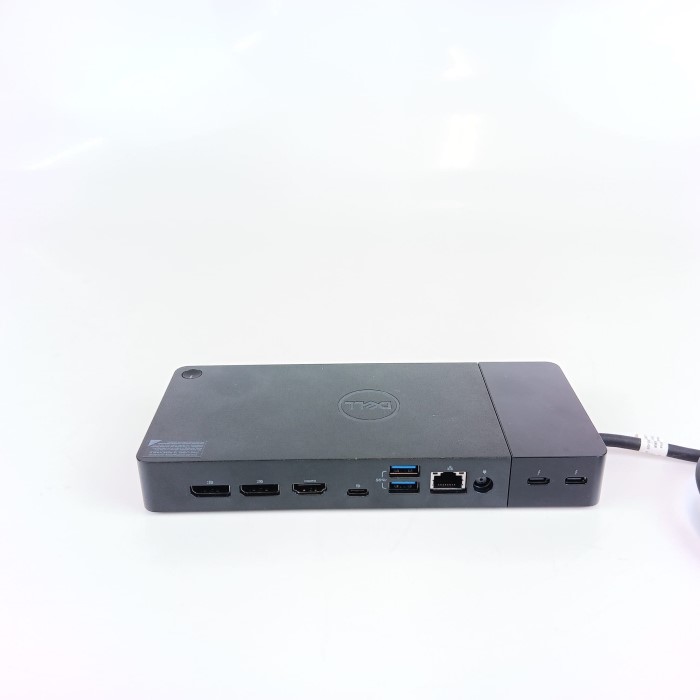
- Multiple Ports: The Dell K20A is equipped with a variety of ports, including USB 3.0, USB-C, HDMI, and Ethernet. These ports facilitate easy connections to a wide range of devices.
- Dual Monitor Support: One of the remarkable features is its ability to support dual monitors. This is a perfect solution for users who require extensive screen real estate for multitasking.
- Power Delivery: The K20A can deliver up to 90 watts of power to your connected laptop. This feature keeps your device charged while you work, eliminating the need for additional power adapters.
- Compact Design: The sleek and compact design of the docking station helps save desk space while still offering considerable connectivity options. Its build quality reflects Dell’s commitment to durability and efficiency.
- Sound and Audio Support: Integrated audio ports make it easy to connect speakers or headphones for an enhanced auditory experience.
By understanding these features of the Dell K20A docking station, you can tailor your setup to fully utilize its capabilities.
Setting Up Your Dell K20A Docking Station: Step-by-Step Guide
Setting up your Dell K20A docking station involves several straightforward steps. Here’s a detailed guide to get you started:
1. Unbox and Inspect
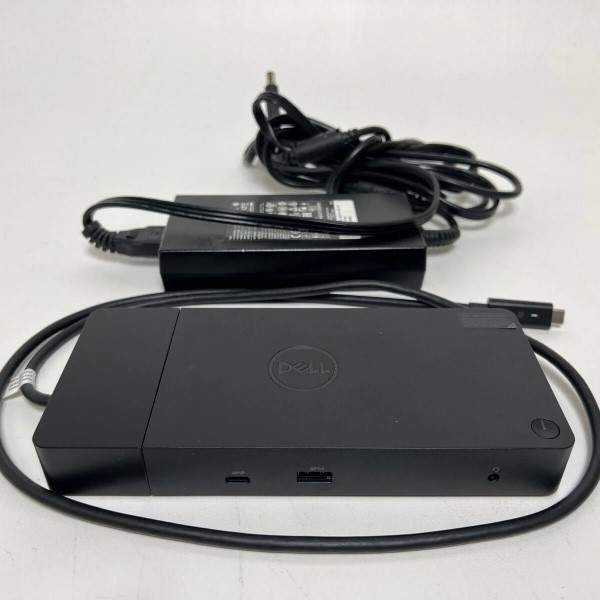
- Check Included Components: Upon receiving your docking station, ensure that all components are included. This typically includes the docking station, power adapter, and relevant cables.
- Inspect for Damage: Make sure there are no signs of physical damage. If any components are missing or damaged, contact the retailer for a replacement.
2. Positioning Your Docking Station
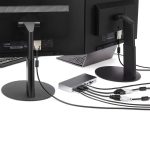
- Choose an Optimal Location: Find a suitable space on your desk where the docking station is easily accessible. This makes connecting and disconnecting devices more convenient.
- Cable Management: Organize nearby cables to prevent clutter. Some users opt for cable organizers to keep things tidy and easily approachable.
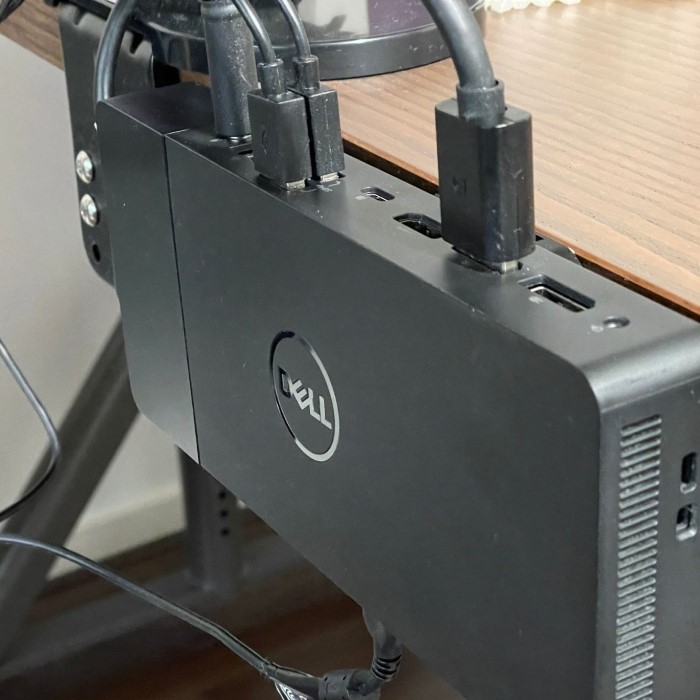
3. Connecting to Your Computer
- USB-C or DisplayPort Connection: Use the USB-C or DisplayPort cable provided with the docking station to connect it to your laptop. Follow the manufacturer’s guidelines to ensure a secure connection.
- Make Sure to Power On: If the docking station has its power source, plug it into an outlet and ensure it is switched on.
4. Connect Your Peripherals
Adding Monitors
- Connect Your Monitor: Start by locating the designated HDMI port on your docking station. This is the port you will use to connect your external monitor. Make sure both the laptop and monitor are powered off to avoid any issues during the connection.
- Use Quality Cables: Ensure that you are using a high-quality HDMI cable to connect the monitor. A good cable will provide better video quality and reduce the risk of signal interference.
- Power On Devices: Once you have made the connection, power on your external monitor and then your laptop. The operating system should automatically detect the new display.
- Adjust Display Settings: Access the display settings on your laptop by right-clicking on the desktop and selecting “Display settings.” Here, you can choose between an extended display setup (where the desktop is expanded across multiple screens) or a mirrored display (where both screens show the same content).
- Select the Right Configuration: Depending on your work needs, decide which display configuration suits you best. This can enhance productivity by allowing you to multitask more effectively across different screens.
Connecting USB Devices
- Identify Available USB Ports: Check the docking station for available USB ports, which may include USB-A and USB-C ports. Make sure to have various cables ready for different device types.
- Plug in Peripherals: Start connecting essential peripherals, such as mice and keyboards, by plugging them directly into the USB ports.
- Connect Additional Devices: You can also connect printers and external drives. For printers, make sure the drivers instal on your laptop so it can recognize and communicate with the device.
- Verify Device Functionality: After plugging in these devices, check that your laptop recognizes them. You may need to go into the device settings or control panel to confirm that everything is functioning correctly.
Audio Devices
- Locate Audio Ports: On the docking station, find the designated audio ports, which typically include a headphone jack and audio output for speakers. Determine which type of audio device you want to connect.
- Connect Speakers or Headphones: Plug your speakers or headphones into the appropriate audio port. If you’re using external speakers, ensure they are powered on and set to the correct input.
- Adjust Sound Settings: Access your laptop’s sound settings by right-clicking the speaker icon in the system tray. Here, you can select your audio output device, allowing you to switch between your laptop’s built-in speakers and the external audio device.
- Test Sound Output: Play an audio file or video to test sound output through the connected speakers or headphones. Adjust the volume settings as needed, ensuring optimal sound quality for your listening experience.
Optimizing the Experience
Once your Dell K20A docking station is set up, consider these tips to optimize your experience:
- Adjust Display Settings: Access your display settings to customize screen resolution and orientation. This setting ensures that your two monitors align with your work style.
- Utilize Shortcut Keys: Many laptops have shortcut keys to switch between display modes. Familiarize yourself with these to quickly change settings when necessary.
- Regular Firmware Updates: Keep your docking station’s firmware updated. Dell often releases updates that enhance performance and compatibility with different devices.
- Power Management: Be aware of the power delivery feature. If you’re working on battery power, ensure the docking station provides sufficient charge to maintain performance.
- Cable Management System: Implement a cable management system to keep wires organized. This not only enhances aesthetics but also prevents tangles and potential damage.
Common FAQs
As you set up your Dell K20A docking station, you may have a few questions. Here are the answers to some common inquiries:
What ports are on the Dell K20A docking station?
The Dell K20A docking station comes equipped with ports including USB 3.0, USB-C, HDMI for video output, an Ethernet port, and audio input/output ports. These connections provide a range of options for peripheral devices.
How many watts is the Dell K20A dock?
The Dell K20A docking station can deliver up to 90 watts of power through its USB-C connection. This capability allows you to power and charge compatible laptops while connected.
How do I reset my Dell K20A docking station?
To reset your Dell K20A docking station, disconnect it from the power source and all connected devices. Wait for approximately 30 seconds, then reconnect the power and devices. This process can help resolve connectivity issues.

Conclusion
In conclusion, setting up your workspace with the Dell K20A docking station allows you to maximize productivity and efficiency. By understanding its features, following proper setup procedures, and optimizing connectivity, you can create a seamless workflow that enhances your daily tasks.
With the right eyes wide shut costume ideas, a deep appreciation for the device’s potential, and an ongoing commitment to maintaining your workspace, you can create a functional environment that inspires creativity and focus. Enjoy your time using the Dell K20A docking station, and elevate your workspace to new heights!