HDMI has become the standard for high-quality audio and video transmission. It’s the go-to connection for TVs, monitors, projectors, and other devices. However, switching to HDMI on your PC isn’t always as straightforward as plugging in the cable. Sometimes, it requires a bit of troubleshooting and configuration. How to switch hdmi on pc? This comprehensive guide will walk you through various methods to ensure your PC successfully switches to HDMI output.
Contents
- 1 Basic Checks Before You Start
- 2 Switching HDMI Through Windows Display Settings
- 3 Using Keyboard Shortcuts
- 4 Troubleshooting Tips
- 5 Additional Tips
- 6 Switching HDMI on Laptops
- 7 HDMI Splitters and Switches
- 8 Common HDMI Issues and Solutions
- 9 Advanced Troubleshooting (For Tech-Savvy Users):
- 10 When to Seek Professional Help:
- 11 Optimizing Your HDMI Experience
- 12 HDMI Alternatives
- 13 Troubleshooting HDMI on Specific Devices
- 14 Conclusion
Basic Checks Before You Start
Before diving into the troubleshooting steps, let’s make sure we cover the basics:
Cable Connections
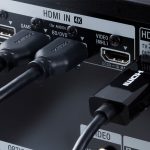
Double-check that your HDMI cable is securely plugged into both your PC’s HDMI port and the display device’s HDMI input.
Power
Ensure both your PC and the display device are powered on.
Input Source
If your display device has multiple input sources (like VGA, DVI, or DisplayPort), make sure you’ve selected the correct HDMI input.
Switching HDMI Through Windows Display Settings
The most common way to switch to HDMI on a Windows PC is through the display settings.
- Right-click on Desktop: Right-click on an empty area of your desktop.
- Select “Display Settings”: This will open the display settings window.
- Identify Displays: You should see a representation of your PC’s display and any connected external displays.
- Choose Your HDMI Display: Click on the representation of your HDMI display.
- Set as Main Display (Optional): If you want your HDMI display to be your main screen, check the box that says “Make this my main display.”
- Adjust Resolution: Ensure the resolution is set to the optimal setting for your HDMI display.
Using Keyboard Shortcuts
Windows offers handy keyboard shortcuts to quickly switch between displays or extend your desktop:
- Windows Key + P: This shortcut opens the “Project” menu, where you can choose how to display your content (PC screen only, duplicate, extend, second screen only).
- Windows Key + Ctrl + F4: This shortcut cycles through available display modes.
Troubleshooting Tips
If your PC isn’t automatically switching to HDMI, try these troubleshooting steps:
- Restart: A simple restart can often resolve display issues.
- Update Drivers: Ensure your graphics drivers are up to date. You can usually download the latest drivers from your graphics card manufacturer’s website.
- Check Device Manager: Open the Device Manager and look for any yellow exclamation marks next to display adapters or monitors. If you see any, try updating or reinstalling the drivers.
- Check Cable and Ports: Try a different HDMI cable or a different HDMI port on your PC to see if that resolves the issue.
- BIOS Settings: In rare cases, you might need to adjust BIOS settings to enable HDMI output. Consult your PC’s manual or manufacturer’s website for instructions.
Additional Tips
- External Displays: If you’re using an external monitor, check its settings to ensure it’s configured to receive HDMI input.
- Projectors: If you’re connecting to a projector, make sure the projector is set to the correct input source and that the resolution matches the projector’s capabilities.
- Multiple Displays: If you have multiple displays connected, you might need to adjust the display arrangement in Windows settings to ensure the HDMI display is active and positioned correctly.
Switching to HDMI on your PC should be a seamless process, but sometimes it requires a bit of troubleshooting. By following these steps and tips, you can overcome any obstacles and enjoy the high-quality audio and video transmission that HDMI offers.
Switching HDMI on Laptops
Laptops usually have a dedicated function key to switch between display modes.
- Locate the Function Key: Look for a key with a monitor icon or a symbol indicating display settings. It’s often one of the F keys (F4, F5, etc.).
- Fn Key Combination: Press and hold the Fn key, then press the designated function key to cycle through display modes. This should toggle between your laptop screen, the external HDMI display, or both simultaneously.
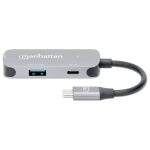
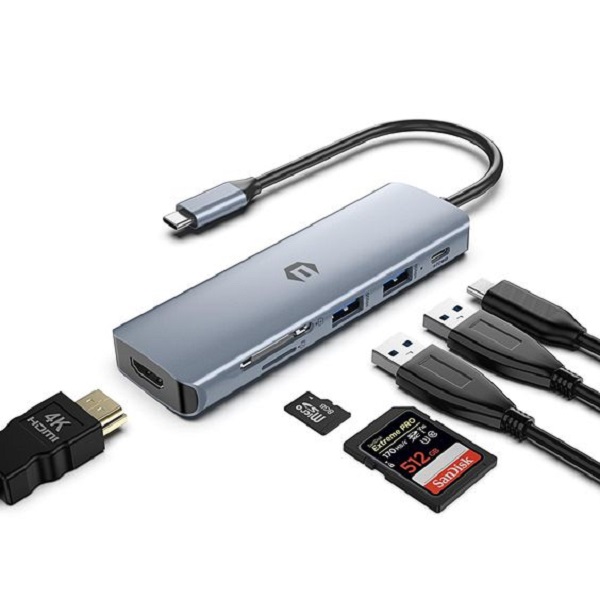
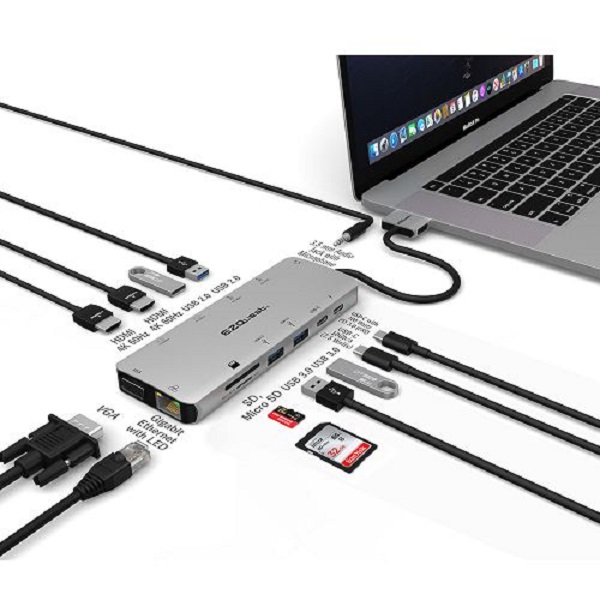
HDMI Splitters and Switches
If you need to connect multiple HDMI devices to your PC or switch between different HDMI displays, consider using a splitter or switch.
- HDMI Splitter: Splits the HDMI signal from your PC, allowing you to connect it to two or more displays simultaneously.
- HDMI Switch: Allows you to switch between multiple HDMI sources connected to a single display.
Common HDMI Issues and Solutions
Even with the right connections and settings, you might encounter some HDMI issues. Here are some common problems and their solutions:
- No Signal:
- Ensure the cable is fully plugged in at both ends.
- Try a different HDMI cable or port.
- Restart your PC and display device.
- Check your display device’s input settings.
- Audio Issues:
- In your PC’s sound settings, make sure the HDMI output is selected as the default playback device.
- Check the audio settings on your display device.
- Update your audio drivers.
- Resolution Problems:
- Adjust the resolution in your PC’s display settings to match the optimal setting for your HDMI display.
- If the display is blurry, ensure the refresh rate is set correctly.
Advanced Troubleshooting (For Tech-Savvy Users):
- Check Graphics Card Settings: Some graphics cards have their own control panels where you can adjust display settings and force HDMI output.
- Update BIOS: In rare cases, updating your PC’s BIOS might resolve HDMI issues. However, proceed with caution, as updating BIOS can be risky if done incorrectly.
When to Seek Professional Help:
If you’ve tried all the troubleshooting steps and still can’t get your PC to switch to HDMI, it might be time to seek professional help from a computer technician.
Switching to HDMI on your PC should be a relatively simple task, but technical hiccups can occur. By understanding the different methods and troubleshooting tips outlined in this guide, you’ll be well-equipped to resolve any issues and enjoy a seamless HDMI experience. Whether you’re setting up a home theater system, connecting to a projector for a presentation, or simply want to enjoy your favorite movies on a larger screen, mastering HDMI switching is an essential skill for any PC user.
Optimizing Your HDMI Experience
Once you’ve successfully switched to HDMI, here are some tips to enhance your viewing experience:
- Adjust Refresh Rate: Higher refresh rates (e.g., 120Hz or 144Hz) can lead to smoother visuals, especially for gaming or fast-paced content. However, ensure your display device and HDMI cable support the chosen refresh rate.
- Calibrate Your Display: Use color calibration tools or the built-in calibration options in your operating system to ensure accurate colors and optimal picture quality.
- Audio Settings: Explore the audio settings on both your PC and display device to fine-tune the sound output and match your preferences.
HDMI Alternatives
While HDMI is the most common connection for high-definition video and audio, there are alternative options:
- DisplayPort: Similar to HDMI in terms of capabilities, DisplayPort is often favored by PC enthusiasts due to its higher bandwidth and support for multiple displays through daisy-chaining.
- DVI: An older standard that still offers decent video quality, but it lacks audio transmission.
- VGA: An even older standard with lower resolution and limited capabilities. It’s best used for older displays that don’t support newer connections.
Troubleshooting HDMI on Specific Devices
Different devices might have unique steps or quirks when switching to HDMI.
- Gaming Consoles: Ensure your console’s video output settings are configured to use HDMI and match the resolution supported by your display device.
- Blu-ray Players: Check the player’s settings to ensure HDMI output is enabled and HDCP (High-bandwidth Digital Content Protection) is turned on if required by your display device.
- Streaming Devices: Make sure your streaming device (like Roku or Chromecast) is plugged into an HDMI port on your TV or monitor and that the correct input source is selected.
Conclusion
HDMI has revolutionized how we connect our PCs to displays, offering a simple and versatile solution for transmitting high-quality audio and video. While the process of switching to HDMI is generally straightforward, troubleshooting might be requiring in some situations. By following this comprehensive guide, you can overcome any obstacles and enjoy a seamless HDMI experience, whether you’re working, gaming, or watching your favorite movies.